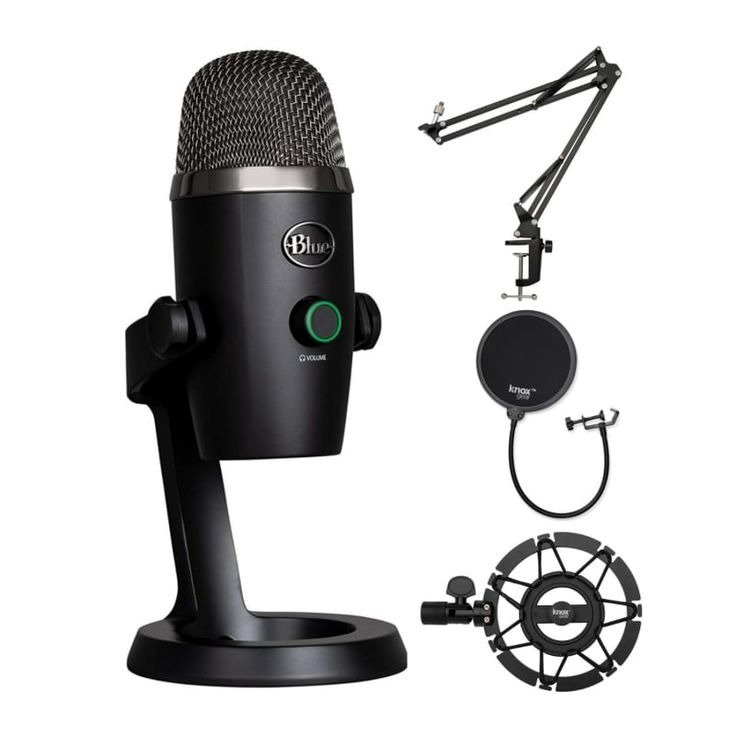
Introduction to Yeti Blue Mic
The Yeti Blue Mic stands out as a top choice for podcasting. Known for its exceptional sound quality, the Yeti Blue Mic makes recording podcasts simple and effective. This microphone offers versatility and professional features that cater to both beginners and experienced podcasters. Its ease of use and high-quality audio output make it a reliable tool in the podcasting community. In addition, the Yeti Blue Mic’s sleek design not only looks good but also includes user-friendly controls. These features collectively make it a preferred microphone for podcasters looking to produce top-notch audio content in 2025.
Key Features of Yeti Blue Mic
When looking for a microphone, the features make all the difference. Here’s why the Yeti Blue Mic stands out.
Professional Sound Quality
The Yeti Blue Mic ensures crisp and clear audio that enhances podcast quality. It captures sound with precision, making it ideal for podcasting where every detail counts. This mic’s professional sound quality is perfect for capturing high-definition audio.
Multiple Pickup Patterns
Versatility is key in podcasting, and the Yeti Blue Mic delivers with its multiple pickup patterns. Whether you are recording solo or with guests, it adapts. You can choose from cardioid, omnidirectional, and bidirectional patterns. This flexibility helps in handling different podcasting scenarios effectively.
User-Friendly Controls
Ease of use is crucial for podcasters, and the Yeti Blue Mic excels here too. It features intuitive controls that allow for quick adjustments. This means less time fiddling with settings and more time recording quality content. The user-friendly controls make it accessible even for podcasting novices.
Setting Up Your Yeti Blue Mic for Podcasting
Setting up the Yeti Blue Mic for podcasting is straightforward. Start by finding a stable, quiet area to place your mic. Ensure the area is free from unnecessary noise interruptions. Next, mount the Yeti Blue Mic on its included stand or a suitable boom arm. This setup enhances stability during recording. Connect the microphone to your computer using the provided USB cable. Ensure the connection is secure to prevent any disruptions. Once connected, select the Yeti Blue Mic as your input device in your recording software. Adjust the gain control to suit your room’s acoustics and your speaking volume. This ensures clear audio capture. Choose a pickup pattern that matches your recording situation. For solo podcasts, the cardioid pattern is usually best. Finally, do a test recording to check sound levels and quality. Make any adjustments necessary to ensure optimal audio performance.

Compatibility with Recording Software
When selecting a microphone for podcasting, its compatibility with various recording software is a crucial factor. The Yeti Blue Mic excels in this area. Let’s look at how it pairs with different software options:
- Plug-and-Play: The Yeti Blue Mic is recognized as a plug-and-play device by most operating systems. This means you can connect it to your computer and it’s ready to use with minimal setup.
- Versatile Compatibility: It works seamlessly with popular recording software such as Audacity, GarageBand, and Adobe Audition. This ensures that whether you are a Mac user or a PC user, the Yeti Blue Mic fits into your workflow.
- No Drivers Required: There’s no need to install specific drivers. The microphone is designed to work with the standard drivers your computer already uses for audio input devices.
- Easy Configuration: Within your chosen recording software, you can easily select the Yeti Blue Mic from the list of audio inputs. This straightforward selection process makes starting your podcast recording hassle-free.
In summary, the Yeti Blue Mic’s compatibility with multiple recording platforms solidifies its position as a top choice for podcasters. Its ease of integration allows creators to focus more on content and less on technical setup.
Comparing Yeti Blue Mic with Other Podcasting Microphones
Weighing options is key to making the right decision for your podcasting needs. Let’s compare the Yeti Blue Mic’s features and benefits against other microphones in its class.
- Sound Quality: The Yeti Blue Mic offers professional-grade sound. Other mics might also offer good quality but may require additional equipment.
- Versatility: With multiple pickup patterns, the Yeti Blue Mic stands out. Few microphones in the same price range offer this feature.
- Ease of Use: User-friendly controls make the Yeti Blue Mic a top choice for beginners. Others might lack intuitive design aspects.
- Plug-and-Play Capability: The Yeti Blue Mic is plug-and-play with most systems. Alternative microphones may need specific drivers or have compatibility issues.
- Price Point: The Yeti Blue Mic is priced competitively. Some mics are cheaper but lack similar features or quality. More expensive options might offer marginal improvements.
Every podcast setup has unique requirements. While the Yeti Blue Mic is versatile, assessing specific needs ensures the best mic choice. Keep in mind overall sound quality, compatibility, and budget when comparing mics. For many, the Yeti Blue Mic will be a harmonious balance between affordability and professional capability.

Optimizing Your Recording Environment for the Yeti Blue Mic
To achieve the best audio quality with the Yeti Blue Mic, environment plays a crucial role. Here are ways to optimize your space for podcasting:
Minimizing Background Noise
Start by minimizing background noise. Turn off fans, air conditioning, and any appliances that create sound. Close windows and doors to block outside noise. The Yeti Blue Mic is sensitive and can pick up minor sounds, so a quiet room is essential.
Enhancing Acoustics
Improve room acoustics by adding soft materials like carpets, curtains, or foam panels. These materials absorb echo and create a clearer sound profile that the Yeti Blue Mic can capture effectively.
Positioning the Mic Correctly
Place the Yeti Blue Mic at a suitable distance from you – not too close to cause distortion, not too far to miss detail. Use the stand or boom arm to bring the mic to mouth level. This helps to maintain consistent audio levels.
Using Pop Filters
Attach a pop filter to your Yeti Blue Mic. It will help to eliminate plosive sounds that can cause peaks in the audio, leading to a smoother recording experience.
Testing and Adjusting
Always test your setup before starting. Make minor adjustments to the mic placement, gain control, and pickup pattern to suit your voice and environment. This fine-tuning can make a significant difference in the audio output quality.
By following these tips and using the Yeti Blue Mic, you’ll create a professional-sounding podcast that stands out. Remember, investing time in optimizing your recording environment will pay off with superior audio results.
Tips for Getting the Best Audio Quality
Achieving the best audio quality with the Yeti Blue Mic involves a few essential practices. Here are tips to help you get the most out of your recordings:
- Optimal Gain Setting: Adjust the gain knob to match your environment and speaking volume. Too high gain can cause distortion; too low may not capture enough sound.
- Steady Mic Positioning: Keep the microphone stable during recording. A boom arm or stand prevents unnecessary movement that can affect sound quality.
- Consistent Distance: Stay at the same distance from the mic throughout your session. Aim for a hand’s width away. This helps maintain audio level consistency.
- Quiet Recording Space: Choose a peaceful spot for recording. The less noise in your environment, the clearer your audio will be. Think of spaces like a quiet room or a closet.
- Regular Sound Checks: Do a quick sound check before you start. It helps you catch any issues early and avoid wasting time recording poor-quality audio.
- Monitor in Real-Time: If possible, use headphones to monitor your audio as you record. It allows immediate feedback and the ability to correct any issues on the fly.
- Post-Production Tweaks: Utilize software to enhance your recordings after the session. Editing can clean up minor flaws and improve overall sound quality.
- Save in High-Quality Formats: Export your podcast in high-quality formats. Options like WAV or AIFF retain better sound fidelity than compressed ones like MP3.
By integrating these tips into your podcasting routine, you boost the audio performance of your Yeti Blue Mic. Remember, excellent sound quality is a cornerstone of engaging and professional podcasting.
User Testimonials and Success Stories
When it comes to making a decision about a product, hearing from satisfied users can be incredibly persuasive. Real-life stories of the Yeti Blue Mic’s impact in the podcasting world highlight its excellence. Here are some testimonials from users who have experienced the difference the Yeti Blue Mic can make:
- Clarity in Every Episode: Jane from ‘Healthy Habits’ podcast remarked, “The sound is crystal clear. It’s as if my listeners are in the same room!”
- Beginner’s Dream Come True: Mike, a newcomer to podcasting, shared, “I was worried about the technical side but setting up the Yeti Blue Mic was simple. It was pretty much plug-and-play.”
- Versatile for All Formats: Olivia from ‘Tech Trends’ noted, “Whether I’m interviewing a guest or doing a solo show, the Yeti Blue Mic’s pickup patterns are perfect.”
- No More Tech Hassles: Gary, who runs a storytelling podcast, praised the ease of use, “I switched to the Yeti Blue Mic and it just works every time, no driver installation needed.”
These success stories underscore the Yeti Blue Mic’s qualities in delivering professional podcasting experiences. From beginners to seasoned podcasters, the Yeti Blue Mic extends its benefits to a wide audience, securing its place as a dependable and cherished tool in the industry. In essence, the mic not only captures great sound, it captures the trust and loyalty of its users.