Importance of Audio Quality in YouTube Vlogging
Good audio is crucial for a YouTube vlog’s success. It keeps viewers engaged and sends a professional message. Poor sound can push viewers away, even if your video content is outstanding. Clear audio also aids in understanding, especially when discussing complex topics or when not all viewers are native English speakers. Moreover, YouTube’s algorithm favors videos with good audio, which can boost your channel’s visibility. Investing in a high-quality YouTube mic is essential for crisp, clear audio that captivates your audience.
Different Types of Microphones for YouTube Creators
Choosing the right YouTube mic can elevate your vlogs from good to great. There are several types of microphones, each with unique advantages for YouTube creators. Let’s explore them.
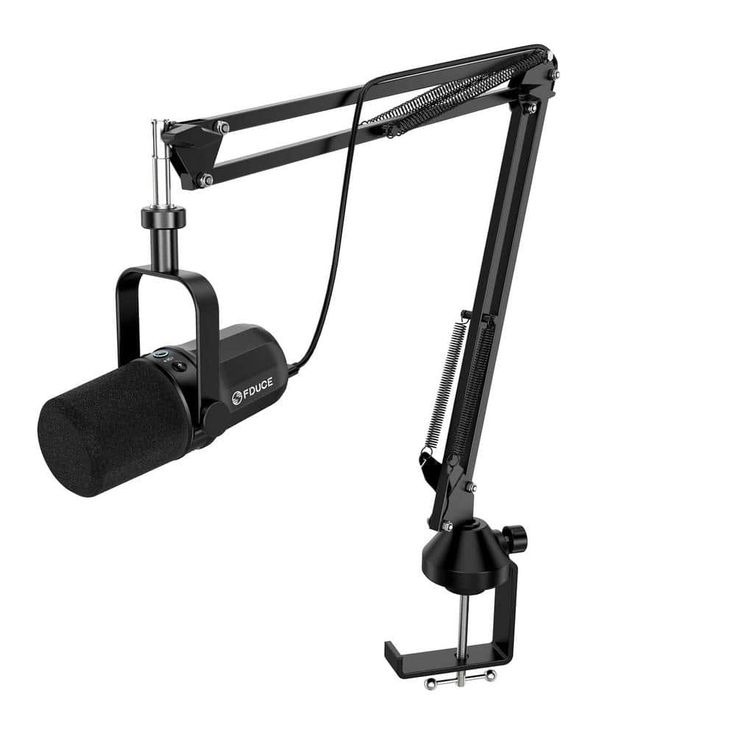
Dynamic Microphones
Dynamic mics are rugged and handle high sound pressure levels well. They’re ideal for loud environments. Such mics often feature a cardioid pattern that picks up sound from the front, minimizing background noise. They suit in-studio or controlled settings.
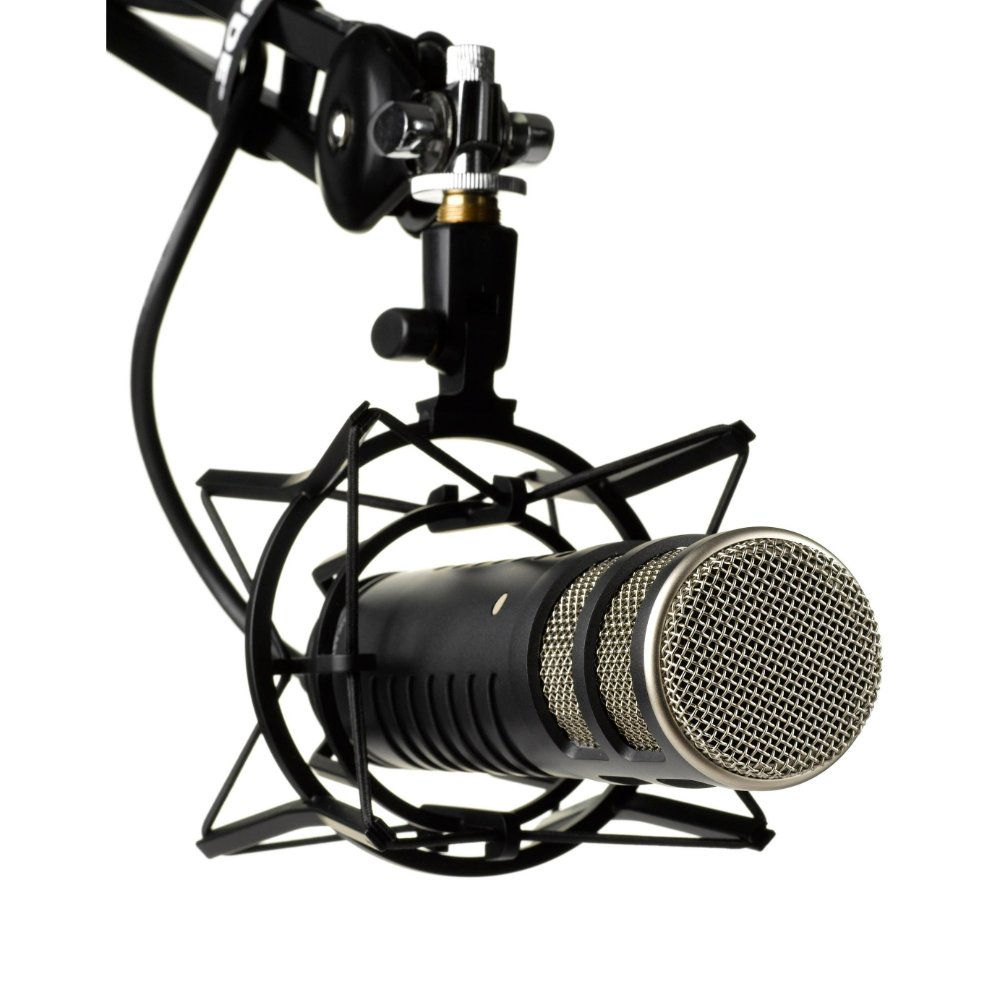
Condenser Microphones
Condenser mics capture sound with precision and detail. They require power, often from batteries or phantom power provided by audio interfaces. Their sensitivity makes them perfect for voiceovers and sit-down interviews where clarity is key.
Lavalier Microphones
Lavalier, or ‘lapel’, mics are small and clip to your clothing. They’re discreet, making them great for on-the-move vlogs or when you want the mic out of the shot. They work well for interviews or how-to videos.
Shotgun Microphones
Shotgun mics have a narrow pickup pattern that captures sound from a specific direction. This feature makes them ideal for outdoor use or when you must record in the presence of ambient noise.
USB Microphones
USB mics connect directly to your computer and are easy to use. They’re perfect for vloggers who want a simple setup without requiring additional audio equipment.
Ribbon Microphones
Ribbon mics are less common but valued for their warm, natural sound. They’re fragile, so typically used in studio environments where handling noise and wind are not issues.
Each type of YouTube mic serves different filming conditions and content styles. It’s important to identify your primary needs before making a purchase. Whether you’re aiming for studio-quality sound or looking for versatility in varied environments, there’s a microphone out there that can meet your vlogging needs.
Considerations Before Buying a YouTube Mic
When hunting for the perfect YouTube mic, you must weigh several factors. These considerations will guide your purchase, ensuring that the microphone fits your vlogging needs and style. Here are key points to ponder before making your decision:
Sound Quality
Opt for a mic that delivers clear and rich sound. Test different models to hear which best captures your voice.
Compatibility
Ensure the mic works with your recording devices. USB mics often plug and play, while others may need extra gear.
Durability
Choose a robust mic if you’re filming outdoors or travel often. It should withstand various conditions without damage.
Directionality
Decide if you need a mic that picks up sound from all directions or just one. This matters in noisy environments.
Size and Portability
If you move around a lot, a small and light mic is ideal. It should fit in your bag without hassle.
Power Requirements
Check if the mic needs batteries or phantom power. Be prepared for extra equipment if that’s the case.
Price
Set a budget for your mic purchase. Remember, quality sound is an investment in your YouTube career.
Reflecting on these elements will help you choose the right YouTube mic. A well-considered decision sets the stage for audio excellence in your vlogs.
Top Microphone Picks for YouTube Vloggers
Now let’s dive into some of the best YouTube mics that are highly regarded by vloggers around the globe. These choices meet various needs from sound quality to budget concerns.
Shure SM7B
This dynamic microphone is a staple for podcasters and vocalists, renowned for its rich sound and ability to filter out background noise. It’s tough, long-lasting, and a top pick for any serious vlogger.
Rode NT-USB
The Rode NT-USB is a versatile condenser mic with excellent sound capture. It connects via USB, making it convenient for plug-and-play setups. It’s a favorite for vloggers who do voice-overs and interviews.
Blue Yeti
A popular choice among beginners and pros alike, the Blue Yeti is a USB mic that offers great sound and ease of use. It has multiple pattern settings for different recording situations.
Audio-Technica AT2020
This mic is known for its clear audio quality and durability. Whether you’re recording in a studio or a living room, the AT2020 performs well in various settings.
Sennheiser MKE 400
A compact shotgun mic designed for on-the-go vloggers, the MKE 400 excels in outdoor environments and is great for capturing sound directly from the source.
Choosing the right YouTube mic from these options depends on your specific vlogging style and needs. High-quality audio can elevate your content, making these mics worthy investments for your YouTube career.
How to Set Up Your YouTube Microphone for Best Results
Once you have chosen your ideal YouTube mic, setting it up correctly is vital. Proper setup ensures that the audio in your vlogs is clear and free from unwanted noise. Here’s a simplified guide to help you get the best audio results.
Choosing the Right Environment
Find a quiet space. You want to avoid areas with background noise. A room with soft furnishings can help dampen echoes. These small changes can make a big difference in sound quality.
Positioning Your Microphone
Place the mic close to you, but not too close to cause distortions. The ideal distance is often around 6 to 12 inches from your mouth. This helps capture your voice clearly without picking up too much background sound.
Testing Your Settings
Before you record your main content, do a test recording. Listen for clarity and adjust the mic settings if needed. It is better to catch and fix issues before you begin rather than after you’ve finished recording.
Adjusting Gain Levels
Set the gain on your microphone or interface so that your voice comes through loud and clear. However, make sure it’s not so high that it creates distortion or picks up unwanted noise.
Using Pop Filters
Attach a pop filter if you have one. It helps reduce plosive sounds like ‘p’ and ‘b’ that can cause spikes in your audio. This simple accessory can enhance the professionalism of your sound.
Monitoring Your Audio
If possible, use headphones to monitor your audio in real-time. This allows you to catch and correct any audio issues as they happen.
With these steps, your YouTube mic should be well set up to deliver high-quality audio for your vlogs. Keep in mind that the right setup may require some trial and error. Take the time to experiment with different settings to find what works best for your individual situation.
Tips for Optimizing Audio Quality in Your Vlogs
To make sure your vlogs sound as good as they look, follow these practical tips for enhancing audio quality. Your YouTube mic can only shine when used to its full potential. Here’s how to optimize audio for your YouTube vlogs.
Select the Right Recording Environment
Choose a quiet spot. Keep away from noise like traffic or humming appliances. Soft materials in your room will reduce echoes. This step alone can greatly improve your vlog’s sound.
Proper Microphone Placement
Position the mic correctly. It should be about 6 to 12 inches from your mouth. Too close, and your voice may distort. Too far, and it may catch unwanted noise.
Record Quality Checks
Always test record. Listen back to ensure clear sound. If it’s not right, adjust your setup before filming your main content. It saves time in the long run.
Adjust Gain Correctly
Balance the gain. Make it loud enough to hear your voice clearly but not so loud it distorts. Correct gain settings help avoid picking up background noise.
Utilize Accessories
Use a pop filter. It’s an affordable way to polish your sound. Pop filters minimize harsh ‘p’ and ‘b’ sounds that can spike your audio levels.
Monitor Sound in Real Time
If possible, wear headphones while recording. This lets you hear issues as they occur. You’ll be able to fix problems on the spot, ensuring top-notch audio.
By keeping these tips in mind, you’ll significantly enhance the audio quality of your vlogs, providing a better experience for your viewers and possibly boosting your rankings on YouTube. Remember, a little extra effort goes a long way in the competitive world of YouTube vlogging.
Budget-Friendly Microphone Options for Beginner Vloggers
For beginners, investing in a top-tier YouTube mic can be daunting. Yet, quality audio should not be a luxury. There are budget-friendly mics that balance cost and quality. Here are some options affordable to novice vloggers.
Fifine K669B
This USB microphone is a steal for its price. It’s easy to set up and delivers clear sound. Great for those just starting out.
Samson Go Mic
Compact and portable, this mic provides good sound quality for vloggers on the move. It clips right onto your laptop.
Boya BY-M1
An inexpensive lavalier mic that offers convenience and decent audio for interviews and field recording.
Neewer NW-700
A condenser microphone that’s surprisingly affordable. It needs phantom power but is a solid choice for beginners.
Audio-Technica ATR2100x-USB
This dynamic mic has USB connectivity. It’s durable and offers great sound for its price range.
These mics are accessible in cost and will help you produce better-sounding vlogs without breaking the bank. Cheaper mics mean you might make compromises, but they still meet basic needs. With these options, you can start vlogging with quality audio and upgrade as your channel grows.
Conclusion: Investing in Your YouTube Career Through Quality Sound
To wrap up, the right YouTube mic is crucial for success. It’s about more than just sound; it’s an investment in your YouTube career. Good audio makes your videos more pleasant to watch and can help retain viewers.
In your vlog journey, always aim for the best audio quality you can. Remember, it impacts viewer engagement and your channel’s growth. Begin with a mic that fits your budget and needs. As you grow, consider upgrading to a mic that can offer enhanced sound quality.
Finally, treat your mic with care. Set it up well, use it properly, and it will serve you long-term. Happy vlogging!