The Nintendo Switch joystick replacement process is essential for maintaining your gaming experience. Over time, joysticks can wear down, leading to problems like joystick drift or unresponsive controls. When these issues arise, many players may feel frustrated, but fortunately, replacing the joystick of your Nintendo Switch is a manageable DIY project. This guide will provide you with all the tools and tips necessary to help you get your device back in optimal working condition.
Signs You Need to Replace Your Nintendo Switch Joystick
Knowing when to replace your Nintendo Switch joystick is important. Ignoring early signs can worsen issues.
Common Issues with Joy-Con Drift
Joy-Con drift is a widespread problem for Switch users. It causes unintended movements during gameplay. This issue occurs even when you aren’t touching the joystick. Common signs include:
- Character or cursor movement on its own.
- Difficulty controlling in-game actions.
- Delayed or inaccurate directional response.
These issues can disrupt gameplay and make games less enjoyable. If you face these problems often, consider replacing the joystick.
Symptoms of a Faulty Joystick
A faulty joystick goes beyond drift problems. Here are other symptoms to look for:
- Joystick feels loose or wobbly.
- Joystick does not return to the neutral position.
- Physical damage like cracks or missing parts.
- Reduced sensitivity during gameplay.
If you notice these issues, replacement might be the best solution. Acting early can prevent further damage to your Joy-Con.
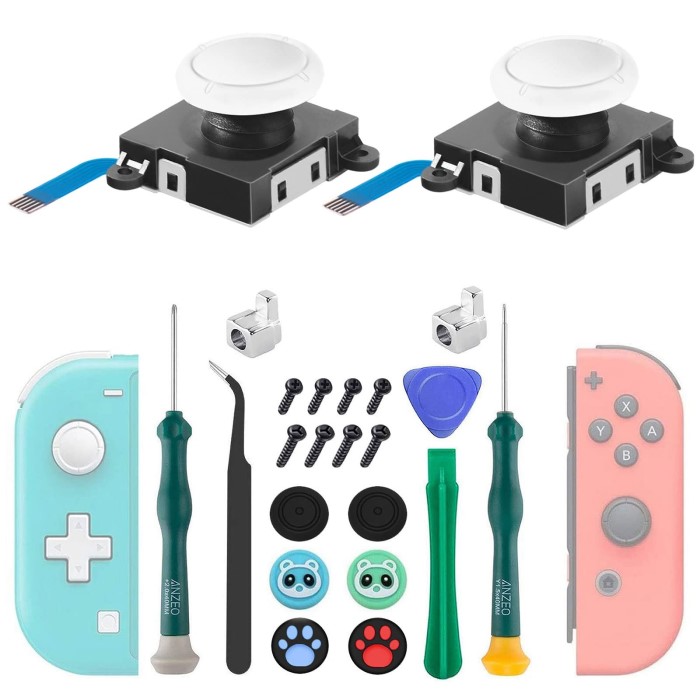
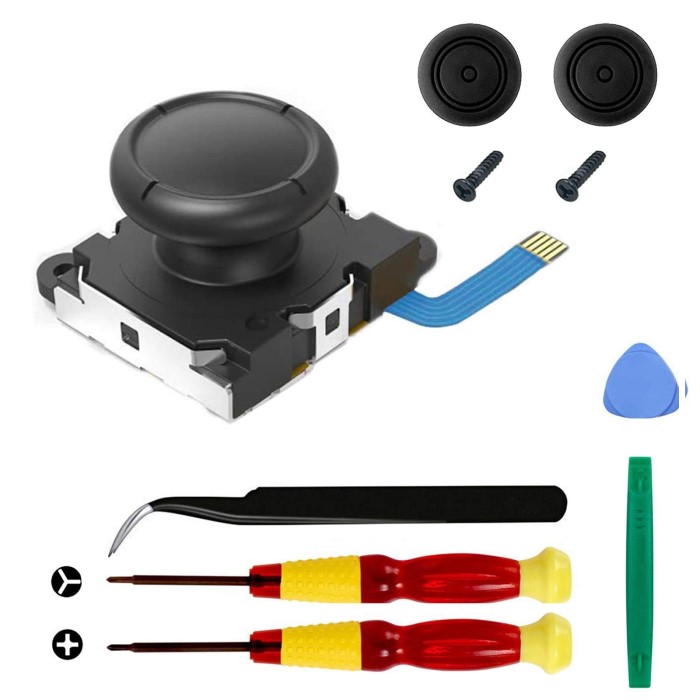
Tools and Materials Needed for Joystick Replacement
Replacing your Nintendo Switch joystick requires the right tools and materials. Being prepared ensures a smooth process.
Essential Tools for the Job
Before you start, gather these essential tools:
- Precision Screwdrivers: Needed for removing tiny screws on the Joy-Con.
- Plastic Pry Tools: Safely open the Joy-Con without causing damage.
- Tweezers: Help with handling small parts and cables.
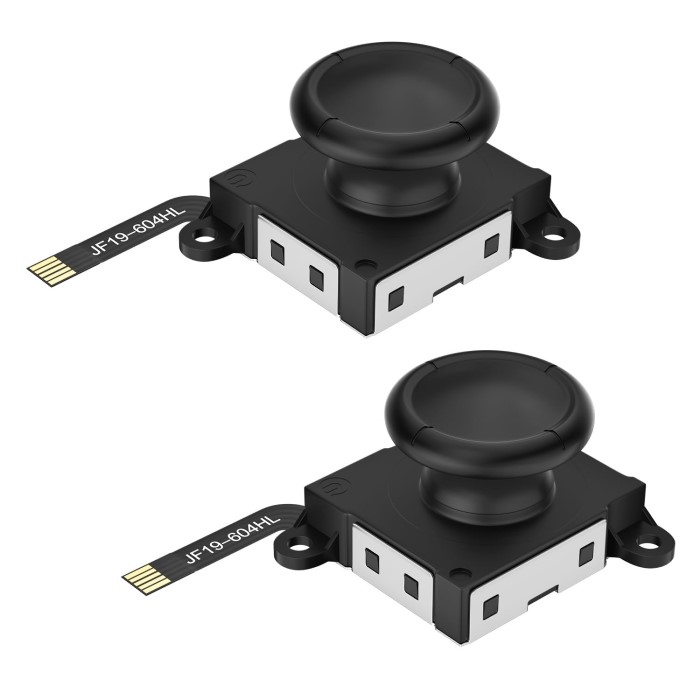
- Replacement Joystick: The new joystick to replace the faulty one.
- Spudger: Useful for disconnecting ribbon cables.
- Miniature Phillips and Tri-Point Screwdrivers: Essential for Joy-Con-specific screws.
- Cleaning Cloth and Alcohol Wipes: To clean the internal components if necessary.
Having these tools ready will save time and prevent mishaps.
Where to Buy Replacement Joysticks
Finding reliable replacement joysticks is important. Here are some common buying options:
- Official Nintendo Store: Offers OEM joystick parts, ensuring compatibility and quality.
- Trusted Online Retailers: Websites like Amazon or eBay provide various options, including third-party replacements.
- Electronics Repair Shops: Local stores may sell replacement joysticks specifically for Switch controllers.
- DIY Kits: Many online retailers sell kits including tools and joysticks in one package.
When purchasing, check customer reviews to ensure quality. Verify compatibility with your Nintendo Switch model. Avoid very cheap options, as they may lack durability.
With the right tools and a reliable replacement joystick, you’re ready to proceed.
How to Prepare Your Switch for Joystick Replacement
Preparing your Nintendo Switch for joystick replacement ensures safety and prevents data loss. Follow these steps carefully.
Backing Up Your Saved Data
Before starting, back up your saved game data. This avoids losing progress during repairs. Use the following methods:
- Cloud Saves: If you have a Nintendo Switch Online subscription, enable cloud saves. This automatically backs up your data online.
- Data Transfers: Manually transfer game saves to another Switch system if you have one.
- Memory Card Backup: Copy saved data files to a memory card using the console settings.
Backing up data protects your progress. It makes restoring easier after joystick replacement.
Powering Down and Disassembling Your Joy-Con
Before disassembling, turn off the console. Follow these steps:
- Power Down: Press and hold the power button for a few seconds. Select “Power Options” and choose “Turn Off.”
- Remove Joy-Con: Slide the Joy-Con controller off the console.
Now, disassemble the Joy-Con safely:
- Use a precision screwdriver to remove screws from the back panel.
- Open the panel with a plastic pry tool to access internal components.
- Disconnect the battery and ribbon cables using a spudger and tweezers.
Handle parts with care to avoid damage. Keep components organized for easy reassembly.
Step-by-Step Nintendo Switch Joystick Replacement Guide
Replacing your Nintendo Switch joystick can be done with careful steps. Follow this guide closely for best results.
Removing the Faulty Joystick
Start by safely disassembling your Joy-Con controller:
- Use a miniature Phillips screwdriver to unscrew the back cover.
- Open the Joy-Con gently with a plastic pry tool.
- Disconnect the battery and ribbon cables using a spudger and tweezers.
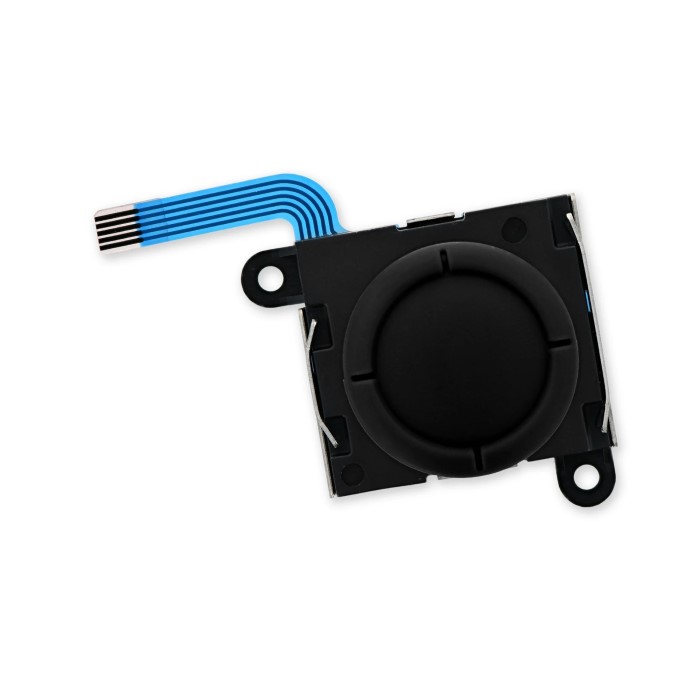
- Locate the joystick module inside the controller.
- Unscrew and remove the faulty joystick from its mounting.
- Detach the joystick cable carefully without applying too much force.
Organize the screws and small components to prevent losing them during the process.
Installing the New Joystick
Attach the replacement joystick with care:
- Align the new joystick into the mounting slot.
- Secure it by screwing it back into place.
- Connect the joystick ribbon cable snugly without bending it.
- Ensure all connected parts are properly seated.
- Double-check connections to avoid functionality issues later.
Ensure the replacement joystick matches the Switch model to avoid incompatibility.
Reassembling the Joy-Con
Finish by reassembling the Joy-Con controller:
- Reconnect all ribbon cables and the battery into their slots.
- Place the back cover onto the Joy-Con gently.
- Screw the back cover tightly using the precision screwdriver.
- Inspect the controller to ensure all parts are secure.
Once reassembled, your Joy-Con is ready for testing. Handle components with care during each step to avoid damages.
Testing Your New Nintendo Switch Joystick
After replacing the joystick, proper testing ensures it’s working as expected. Follow these steps carefully to verify functionality.
How to Calibrate the New Joystick
Calibration helps the console recognize and optimize the new joystick’s performance. Here’s how you do it:
Turn on Your Console:
-
- Begin by pressing the power button on your Nintendo Switch console to turn it on.
- Once the console is powered up, you will be directed to the main menu, which displays all available options and games.
- Ensure that your console is fully charged or plugged into a power source to avoid interruptions during this process.
Access System Settings:
-
- Look for the gear icon, which represents the “System Settings” menu, located on the main menu screen.
- Using either the touchscreen or the joystick, navigate to the gear icon and select it by pressing the A button or tapping on it.
- The System Settings menu will open, displaying various configuration options that allow you to customize your console settings.
Select ‘Controllers and Sensors’:
-
- Scroll down through the list of options in the System Settings until you locate “Controllers and Sensors.”
- This section contains several settings related to your controller’s functionality and performance.
- Use the joystick or the touchscreen to highlight the “Controllers and Sensors” option, then select it to proceed.
Find ‘Calibrate Control Sticks’:
-
- Within the “Controllers and Sensors” menu, you will see several options related to controller calibration and adjustments.
- Look for the option labeled “Calibrate Control Sticks,” which is crucial for ensuring your joysticks respond correctly during gameplay.
- Click on “Calibrate Control Sticks” to initiate the calibration process, which may improve your gaming experience.
Follow On-Screen Instructions:
-
- After selecting the calibration option, the console will display a series of on-screen instructions.
- These instructions will guide you through the calibration process, instructing you to move the joystick in various directions: up, down, left, right, and diagonally.
- Pay close attention to the prompts and move the joystick smoothly as instructed to ensure proper calibration.
Save Calibration Data:
-
- Once you have completed the joystick movements as per the on-screen instructions, you will be prompted to save the calibration data.
- Confirm the changes by selecting the appropriate option, which usually involves pressing the A button or tapping a designated button on the screen.
- Saving the calibration ensures that the controller is properly aligned and ready for gameplay, enhancing your overall gaming experience.
Testing the joystick with games after calibration will further verify the replacement’s success.
Troubleshooting Common Replacement Issues
Sometimes, issues can arise after the replacement. Here are common problems and their solutions:
- Joystick Not Recognized by Console:
- Check if the ribbon cable is securely connected.
- Disassemble and reseat the cable carefully.
- Joystick Feels Unresponsive:
- Recheck calibration to improve sensitivity.
- Ensure no debris is blocking joystick movement.
- Drift Still Occurs:
- Verify the replacement joystick is compatible.
- If issue persists, you may need a different replacement part.
- Loose or Wobbly Joystick:
- Tighten screws securing the joystick.
- Inspect for physical defects in the replacement.
Addressing these issues promptly ensures your Joy-Con works smoothly. Testing thoroughly prevents long-term problems and optimizes gameplay experience.

Tips to Extend the Lifespan of Your Nintendo Switch Joystick
Taking care of your Nintendo Switch joystick can prevent frequent replacements. Follow these tips for longevity.
Proper Maintenance and Cleaning
Regular maintenance keeps your joystick in top condition. Here are simple steps to follow:
- Clean Often: Use a soft cloth to remove dust, dirt, and debris from the joystick.
- Avoid Moisture: Keep the joystick dry. Liquid exposure can cause permanent damage.
- Use Alcohol Wipes: Clean with alcohol wipes to remove oils and germs without harming the surface.
- Inspect for Wear: Check for loose parts or physical damage. Early fixes prevent bigger problems.
- Don’t Touch Opened Controllers: If cleaning inside, wear gloves to prevent oils from fingers interfering.
Proper cleaning ensures your joystick stays responsive and avoids wear caused by debris.
Avoiding Excessive Wear and Tear
Preventing wear improves joystick reliability. Utilize the following precautionary measures:
- Handle with Care: Avoid pressing the joystick down aggressively or with excessive force.
- Use the Right Stick for Tasks: Avoid using joysticks for repeated tasks like button-clicks.
- Store Controllers Safely: Place Joy-Con in a protective case when not in use.
- Avoid External Pressure: Do not pile objects on your Joy-Con or console.
- Play Responsibly: Limit gaming sessions to avoid overuse that deteriorates joystick parts quickly.
Good habits extend your joystick’s lifespan and improve gaming experience. Always handle it with care.
Alternative Options to Fixing Joy-Con Drift
If you’re dealing with Joy-Con drift, you have more options than just replacing the joystick. Whether you’re hesitant to repair it yourself or need another solution, consider these alternatives.
Repair Services vs. DIY Replacement
When facing joystick issues, you can either fix it yourself or seek professional repair. Here’s a breakdown to help you decide:
DIY Replacement:
- Cost-effective if you already own the tools and materials.
- Allows you to control the replacement process from start to finish.
- Requires patience, precision, and some technical skills.
- Risk of damaging parts if you’re inexperienced.
Professional Repair Services:
- Ideal if you’re not confident in DIY repairs.
- Saves time and ensures proper handling by experts.
- Comes with warranties from trusted repair shops, adding reassurance.
- Costs more compared to DIY repairs.
Choose DIY if you’re comfortable with repairs. Opt for professional services to avoid risk and ensure quality fixes.
Using Third-Party Joysticks or Controllers
Another solution is switching to third-party accessories. These can replace faulty Joy-Con joysticks or even the controllers themselves:
Third-Party Joysticks:
- Can be more affordable than OEM joysticks.
- Widely available and offer varied sensitivity options.
- May lack the durability or compatibility of original parts.
Third-Party Controllers:
- Work as standalone replacements for Joy-Con controllers.
- Usually cheaper than official Nintendo Joy-Con.
- Some designs cater to ergonomic comfort and longer battery life.
- May miss out on features like motion controls or Amiibo compatibility.
Before buying, check reviews and compatibility details. Third-party options can be great budget-friendly alternatives.
Whether you choose repair services, DIY, or third-party options, consider your budget, skills, and preferences. Joy-Con drift is frustrating, but there’s always a solution that fits your needs.
Frequently Asked Questions About Nintendo Switch Joystick Replacement
How Long Does the Replacement Process Take?
Replacing a Nintendo Switch joystick typically takes 30 to 60 minutes. Time varies based on experience.
- Disassembly Time: Removing the Joy-Con and faulty joystick takes about 15 to 30 minutes.
- Installation Time: Attaching the new joystick and reassembling takes another 15 to 30 minutes.
Prep and organization before starting can help you finish faster. Beginners may take longer due to learning steps.
Is It Safe to Replace the Joystick Yourself?
Yes, replacing the joystick can be safe if you follow guidelines correctly. However, caution is key.
- Use Proper Tools: Ensure you have the right tools, like precision screwdrivers and spudgers, to avoid damage.
- Handle With Care: Small parts are delicate; improper handling can break them.
- Follow Instructions: Use detailed guides to avoid mistakes during replacement.
- Backup Saved Data: Protect your progress by backing data up before starting repairs.
- Test After Replacement: Check functionality thoroughly to ensure proper installation.
If you are unsure, consider professional repair services for a safer replacement. Expertise ensures a risk-free process.
Conclusion
In conclusion, the Nintendo Switch joystick replacement process is a feasible DIY project for gamers eager to maintain their controllers. With the right tools and steps outlined in this guide, you can successfully replace your joystick and restore your gaming experience.
Regular maintenance and care can extend the life of your controller, ensuring you enjoy uninterrupted gameplay. By following the tips outlined, you can prevent joystick drift and other common issues, making your time spent gaming much more enjoyable. Happy gaming!