Introduction to PS5 Controller Joystick Issues
If you’ve been gaming on your PlayStation 5, you may have noticed that your controller’s joysticks aren’t performing as they once did. Whether it’s due to wear, tear, or the infamous joystick drift, you might be considering a PS5 controller joystick replacement. In this article, we’ll discuss everything you need to know about replacing your PS5 controller’s joystick, including the tools required for the job and a step-by-step guide. By the end, you’ll feel confident tackling this repair yourself.
Common Problems with PS5 Joysticks
Joystick Drift:
-
- Definition: Joystick drift refers to the phenomenon where the joystick registers movement even when it is not being touched or manipulated by the user.
- Causes: This issue can stem from wear and tear of the joystick components, dust accumulation, or internal electrical faults.
- Impact on Gameplay: Joystick drift can severely hinder gameplay, causing characters or vehicles to move unexpectedly and making it difficult for players to maintain control.
Stiff or Stuck Movement:
-
- Definition: Over time, joysticks may become stiff or feel stuck, making it challenging to move them smoothly.
- Causes: This issue is often caused by debris, dirt, or dust that accumulates in the joystick’s housing or around its base, leading to friction that impedes movement.
- Impact on Gameplay: A stiff joystick can negatively affect a player’s ability to respond quickly or accurately in fast-paced gaming scenarios, leading to frustration and decreased performance.
Unresponsive Inputs:
-
- Definition: Unresponsive inputs occur when the joystick does not register movements or commands consistently during gameplay.
- Causes: This can happen due to faulty wiring, internal component failures, or poor connectivity with the gaming device.
- Impact on Gameplay: Unresponsive inputs can lead to missed actions, ineffective maneuvering, and can ultimately ruin the gaming experience, particularly in competitive settings.
Physical Damage:
-
- Definition: Physical damage includes any visible impairment to the joystick, such as cracks, misalignments, or broken components.
- Causes: This type of damage can result from accidental drops, hard impacts, or excessive force applied during use.
- Impact on Gameplay: Physical damage can compromise the functionality of the joystick, leading to erratic behavior, complete failure, or a reduced lifespan of the gaming accessory, which can be costly to repair or replace.
Each of these problems can interfere with your gaming experience. Recognizing these issues helps you decide whether a repair or replacement is necessary.
Signs Your Joystick Needs Replacement
- Constant Drifting: If calibration doesn’t fix the drift, the joystick might need replacement.
- No Movement Registered: If turning or pushing the joystick doesn’t translate to in-game movements.
- Visible Damage: Cracks, unusual angles, or disconnected parts are indicators for replacement.
- Worn-Out Grip: The top grip wears out, making the joystick uncomfortable to use.
If you notice these signs, consider replacing the joystick promptly. Timely action prevents further device and enhances gameplay efficiency.
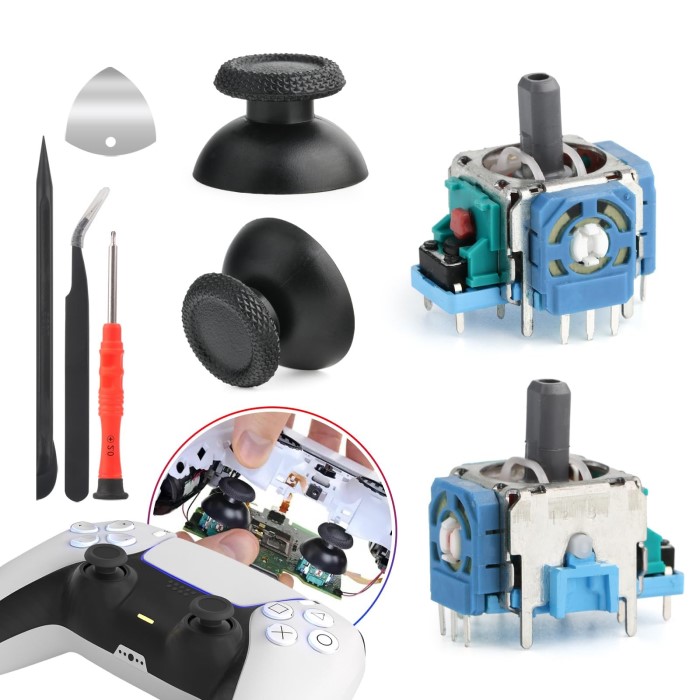
Tools and Materials Needed for Joystick Replacement
Replacing your PS5 joystick requires specific tools and materials for a smooth process.
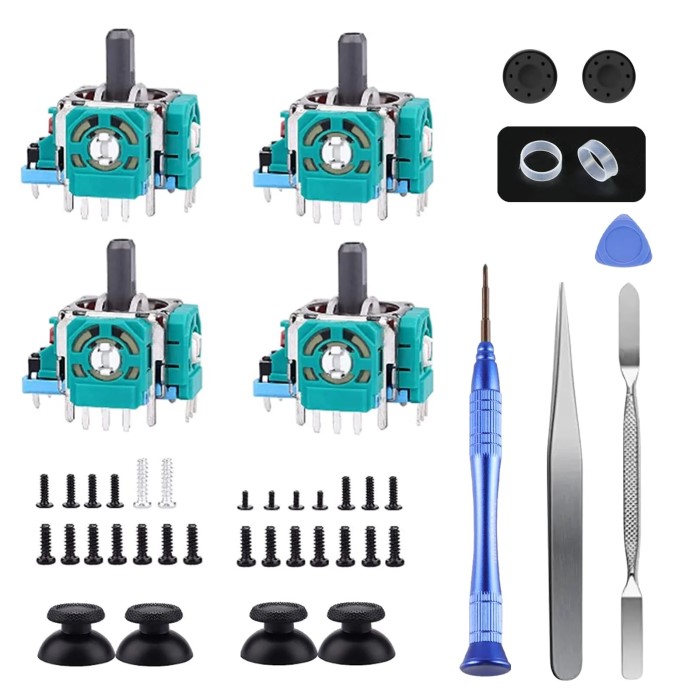
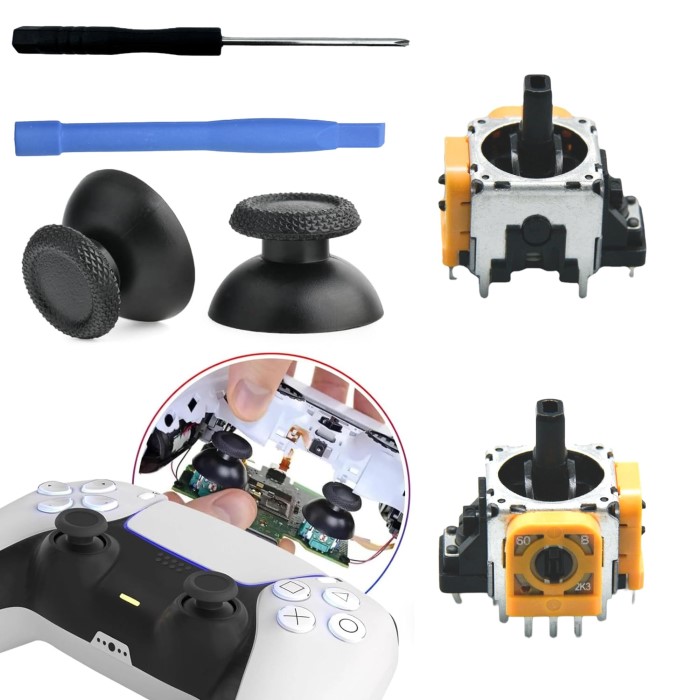
Essential Tools for the Replacement Process
- Phillips Head Screwdriver: Needed to remove the screws on the controller.
- Plastic Pry Tools: Helps in safely opening the controller case without causing damage.
- Soldering Kit: For installing new joystick components, if soldering is required.
- Tweezers: Assists in handling small internal parts during replacement.
- Flat Surface: Provides a stable workspace for disassembly and assembly processes.
- Cleaning Supplies: Utilize rubbing alcohol and microfiber cloth for cleaning debris during repair.
Ensure these tools are ready to avoid interruptions while working.
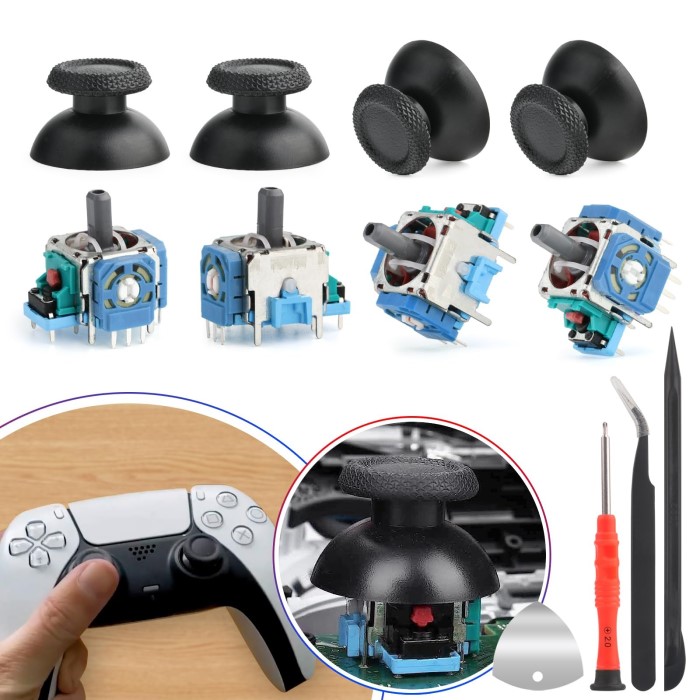
Recommended Replacement Joystick Parts
- OEM Joystick Modules: Buy original components for compatibility and smoother function.
- Third-Party Joystick Modules: Affordable options, though ensure quality before purchasing.
- Plastic Covers: Replace worn-out joystick caps for better grip and comfort during gameplay.
- Extra Screws: Have spares handy in case original screws are lost.
High-quality replacement parts ensure durability and proper functionality after installation.
Preparing for the Replacement Process
Before the ps5 controller joystick replacement, preparation is crucial for a smooth process.
Safety Tips Before Starting
- Power Off the Controller: Turn off your PS5 controller to avoid electrical damage.
- Unplug from Console: Detach the controller from the PS5 to ensure safety during disassembly.
- Work in a Static-Free Area: Choose a workspace that prevents static electricity build-up.
- Wash Your Hands: Keep hands clean to protect internal components from dirt and oils.
- Wear Anti-Static Wristbands: These help reduce the risk of electrostatic discharge damaging parts.
By following these tips, you can ensure a safe and stress-free process.
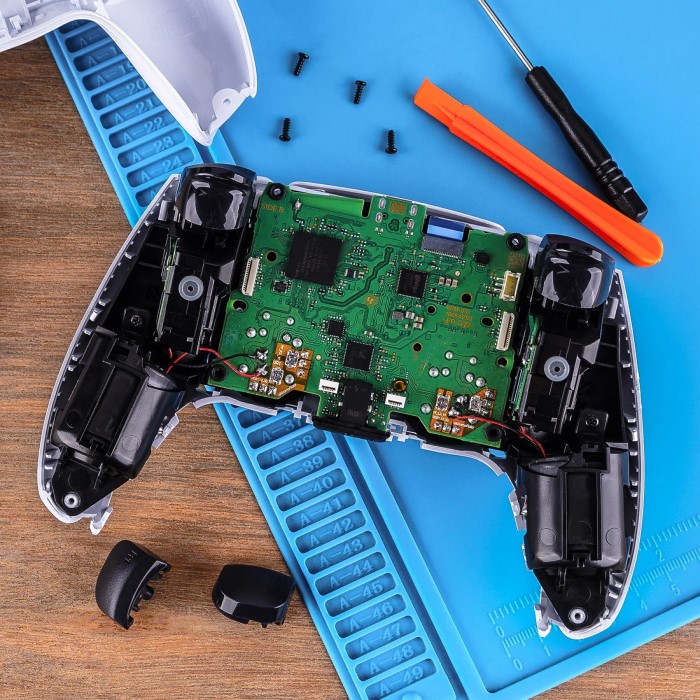
How to Disassemble Your PS5 Controller
- Remove the Cover: Use a plastic pry tool to carefully detach the controller’s plastic shell.
- Unscrew the Back Panel: Use a Phillips head screwdriver to loosen the screws.
- Disconnect Internal Wires: Gently unplug cables connecting the back panel to the controller.
- Locate the Joystick: Identify the joystick module on the circuit board.
- Prepare for Removal: Ensure all required parts are visible and accessible before proceeding.
Proper disassembly is key to successfully replacing the joystick. Take your time to avoid damage.
Step-by-Step Guide to Replacing the Joystick
Replacing the joystick on your PS5 controller follows a careful and systematic process. Follow the outlined steps to ensure a successful repair.
Removing the Old Joystick
- Locate the Joystick Module: Identify the damaged joystick on the controller’s circuit board.
- Unplug Connected Wires: Carefully disconnect any wires attached to the joystick module.
- Unscrew the Joystick Assembly: Use the Phillips screwdriver to remove screws holding the joystick in place.
- Detach the Module: Gently pull out the joystick module without damaging surrounding components.
- Clean the Area: Use rubbing alcohol and a microfiber cloth to clean debris around the joystick area.
Proper removal ensures the controller isn’t further damaged during replacement.
Installing the New Joystick
- Insert the Replacement Module: Place the new joystick module exactly where the old one was.
- Secure with Screws: Tighten screws firmly using a Phillips screwdriver to hold the joystick in place.
- Connect Wires: Reattach any wires to the new joystick securely.
- Verify Placement: Ensure the joystick sits correctly and moves freely before reassembling.
- Inspect Components: Check for loose wires or misplaced parts before moving to the next step.
Using quality replacement parts improves the joystick’s performance and durability.
Reassembling the Controller
- Reattach Back Panel Wires: Connect any wires disconnect during disassembly to the back panel.
- Align the Back Panel: Ensure the back panel matches correctly with the controller case.
- Secure Screws: Use a screwdriver to tighten all screws on the controller casing.
- Snap On Plastic Cover: Carefully attach the front and rear plastic covers.
- Perform Final Check: Ensure all parts are secured and the controller is properly closed.
With the controller fully assembled, you are ready to test the new joystick.
Testing Your PS5 Controller Post-Replacement
After replacing the joystick on your PS5 controller, testing its functionality is crucial. Ensure every function works as intended to maintain optimal gameplay performance.
Verifying Joystick Functionality
- Connect the Controller to PS5: Pair the controller with your console to begin testing.
- Launch a Game: Choose a game that heavily relies on joystick input for testing purposes.
- Move the Joystick: Test directional movements to see if they respond correctly on-screen.
- Check Sensitivity: Verify that slight movements register accurately and smoothly during gameplay.
- Run Calibration: Use settings on your PS5 to calibrate the joystick for better accuracy.
- Inspect Grip Comfort: Ensure the new joystick feels comfortable during extended play sessions.
Successful verification confirms your replacement effort worked well.
Troubleshooting Common Issues
- Non-Responsive Joystick: Check if the screws and wires were secured tightly during installation.
- Drifting Movement: Verify the placement of the joystick module to ensure it’s installed correctly.
- Physical Misalignment: Reopen the controller to inspect the joystick’s positioning on the circuit board.
- Connection Problems: Ensure the controller is properly connected with the console.
- Software Calibration Problems: Recalibrate the joystick using the console settings.
- Damage to Nearby Components: Ensure no surrounding parts were harmed during the process.
Addressing these issues makes sure your controller performs optimally after the replacement.
Maintenance Tips for Long-Lasting Joystick Performance
Proper maintenance ensures your PS5 controller’s joystick remains functional for a long time. Small preventive steps can save money and improve gameplay performance.
Keeping Your PS5 Controller Clean
- Regular Cleaning: Wipe your controller frequently with a microfiber cloth to remove dust and sweat.
- Use Rubbing Alcohol: Apply rubbing alcohol to clean the joystick area and remove accumulated debris.
- Avoid Liquid Contact: Keep the controller away from water or any liquid spills.
- Inspect for Dirt: Check the base of the joystick regularly for gunk or build-up.
- Store Safely: Place your controller in a dry, dust-free area when not in use.
- Caps Replacement: Replace worn-out joystick caps to maintain a strong grip.
Regular cleaning prevents debris from affecting joystick movement and ensures smooth functionality.
Avoiding Joystick Drift in the Future
Avoid Rough Handling:
-
- Definition: Rough handling includes any aggressive or careless use of the joystick that could potentially damage its internal mechanisms.
- Best Practices: Handle the joystick with care by using a gentle grip and avoiding excessive force when pushing, pulling, or tilting it.
- Benefits: By treating the joystick delicately, you can help maintain the integrity of its internal components, which will prolong its lifespan and enhance overall performance during gameplay.
Calibrate Periodically:
-
- Definition: Calibration is the process of adjusting the joystick settings to ensure that it accurately detects movement and responds correctly.
- Frequency: Regularly calibrate your joystick, particularly after extended use or if you notice any changes in its responsiveness.
- Benefits: Performing calibration checks not only helps maintain the accuracy of the joystick’s sensitivity but also prevents issues like drift, ensuring a smoother and more enjoyable gaming experience.
Minimize Impact Damage:
-
- Definition: Impact damage refers to harm inflicted on the joystick from falls or hits that can affect its structural integrity.
- Precautions: Always place your controller on stable surfaces and avoid dropping it. Consider using a padded case or stand when not in use.
- Benefits: Minimizing impact damage helps protect the joystick from fractures and misalignments, ultimately ensuring reliable performance and reducing the need for repairs or replacements.
Prevent Over-Usage:
-
- Definition: Over-usage refers to prolonged periods of gaming without breaks, which can lead to fatigue and increased wear on the joystick.
- Recommended Practices: Implement regular breaks during long gaming sessions; for instance, pause for a few minutes every hour to stretch and rest.
- Benefits: Taking breaks can not only enhance your physical comfort and focus but also reduce the mechanical stress on the joystick, helping to preserve its functionality over time.
Use Protective Covers:
-
- Definition: Protective covers, such as joystick caps or silicone skins, are accessories designed to safeguard the joystick’s surface and improve user comfort.
- Purpose: These covers help prevent physical wear from repeated use, provide a better grip, and can add a personalized touch to your gaming setup.
- Benefits: By using protective covers, you can enhance the durability of your joystick and maintain a comfortable and responsive gaming experience, especially during intense gameplay sessions.
These steps reduce the likelihood of joystick drift, ensuring consistent performance over time.
When to Seek Professional Help
Replacing a PS5 controller joystick may seem easy, but sometimes issues require expert attention.
Identifying Complex Damage
- Internal Circuit Damage: Issues with the controller’s circuit board need skilled repair techniques.
- Multiple Broken Parts: If more than the joystick is damaged, professional help is ideal.
- Soldering Challenges: Improper soldering may harm surrounding components, requiring advanced skills.
- Non-Responsive Controller: If the controller remains unresponsive after replacement, internal diagnostics may be needed.
- Visible Burn Marks: Burn marks on wires or circuits are signs of electrical damage that experts should handle.
Recognizing these signs helps you decide if DIY repair is enough or if professional repair is needed.
Benefits of Professional Repairs
- Expert Diagnosis: Professionals accurately identify issues beyond visible damage.
- Proper Tools: They use advanced tools to handle delicate repairs safely.
- Reliable Repair: Professional repairs ensure longer-lasting functionality with quality replacement parts.
- Saves Time: Skilled technicians complete repairs quicker than DIY fixes.
- Safe Handling: Experts minimize risks of further damage during repair.
- Warranty Options: Some repairs come with warranties for added peace of mind.
Choose professional help when unsure about repairs or facing complex issues. This ensures the best results.
Conclusion
Performing a PS5 controller joystick replacement can seem daunting, but with the right tools and guidance, it can be a straightforward process. By following this guide, you can restore your controller’s functionality and avoid costly replacements. Remember that regular maintenance is key to prolonging the life of your gaming gear. Happy gaming, and enjoy your restored controller!