Introduction
Many users encounter the frustrating situation of asking, “Why is my hard drive not showing up?” This issue can arise suddenly, leaving you worried about possible data loss. External hard drives, internal drives, and even USB flash drives can sometimes become invisible to your computer. Understanding why this happens is crucial. It can help you troubleshoot effectively and recover your valuable files.
Common Reasons Why Hard Drives Fail to Show Up
Hard drives may fail to appear due to various reasons. Below are common issues that can cause this problem.
Hardware Issues
Physical damage to the hard drive can prevent detection. This could include internal failure, broken components, or wear and tear. If the drive’s lifespan is exceeded, it may stop functioning. Sometimes, overheating may also cause hardware failure. Regular maintenance ensures the hard drive remains in good condition.
Connection and Cable Problems
Loose or faulty cables can disrupt the connection between the hard drive and the computer. Check whether the USB or SATA cable is properly connected or damaged. Try swapping the cables or using a different port. Poor connection can also occur due to dirt or wear on the connectors.
Incorrect BIOS or UEFI Settings
Incorrect BIOS or UEFI settings can block hard drive recognition. If settings are misconfigured, the computer may not detect the drive. Ensure that the storage mode is set correctly in the BIOS. Sometimes, outdated firmware can also cause detection issues. Regularly update BIOS or UEFI to avoid this problem.
How to Troubleshoot a Missing Hard Drive
Troubleshooting a missing hard drive can help identify and resolve detection issues. Below are steps to carefully follow.
Checking Physical Connections
Ensure the hard drive’s cables are properly connected to the computer. Inspect USB or SATA cables for damage or wear. Replace faulty cables or use alternative ports to test the connection. Dust or dirt on connectors might disrupt the connection, so clean them if necessary.
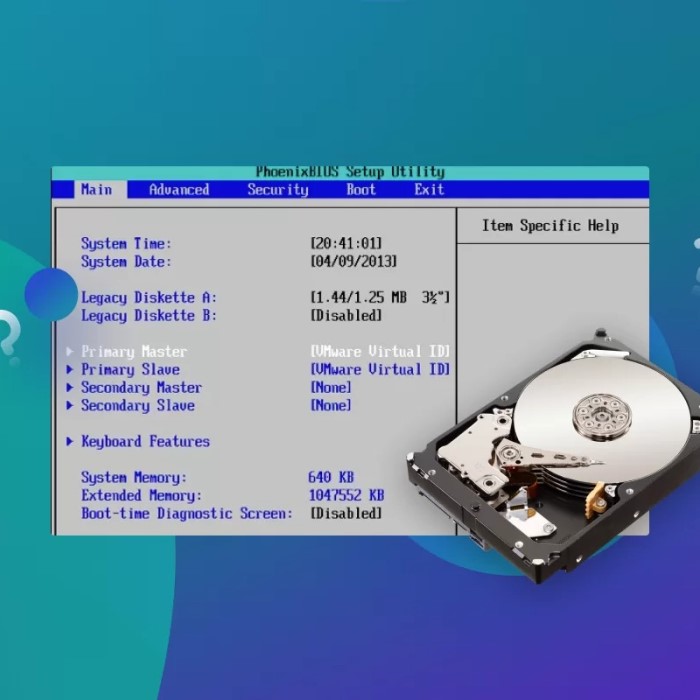
Verifying Drive Detection in BIOS/UEFI
Access your computer’s BIOS or UEFI settings during startup. Check if the hard drive appears under connected devices. Ensure the storage mode configuration is correct. Update BIOS or UEFI firmware to improve hardware compatibility and recognition.
Testing on Another Computer
Connect the hard drive to a different computer to determine if the problem persists. If the drive shows up on another device, the problem may be with your computer’s hardware or software. Testing with multiple computers can help pinpoint the issue more accurately.
Software Solutions
If your hard drive is not showing up, software solutions can help fix the issue. Below are practical steps to resolve detection problems.
Updating or Reinstalling Drivers
Outdated or corrupted drivers often cause a hard drive to remain undetected. Open the Device Manager on your computer. Locate the hard drive under “Disk Drives” or “Unknown Devices.” Right-click and select “Update Driver Software.” Follow on-screen instructions to complete the update. If updating does not work, uninstall the driver and restart the computer. The system will reinstall the driver automatically. This ensures the drive operates with the latest compatible software.
Initializing a New Hard Drive
A new hard drive may require initialization before use. Open “Disk Management” from your computer’s settings. Locate the unallocated disk marked “Not Initialized.” Right-click it and select “Initialize Disk.” Choose either MBR (Master Boot Record) or GPT (GUID Partition Table) based on your requirements. Once initialized, create a new partition and format the drive. This process prepares your new drive for storage and ensures it is detectable.
Assigning or Changing the Drive Letter
Sometimes, a missing or conflicting drive letter prevents detection. Access “Disk Management” from the computer settings. Find the hard drive in the list of disks. If it lacks a drive letter, right-click and select “Change Drive Letter and Path.” Click “Add” to assign a new letter or “Change” to select a different one. Confirm the changes and check if the drive now appears. Assigning a new letter often resolves the issue easily.
Fixing a Hard Drive Not Showing Up on Windows
When your hard drive isn’t recognized on a Windows PC, you can use several methods to fix the issue. Below are solutions to try.
Using Disk Management
Open “Disk Management” by searching for it in the Start menu. Check if your hard drive appears in the list. If the drive is unallocated or not initialized, right-click it and choose “Initialize Disk.” Select MBR or GPT based on your setup needs. Create a new partition and format the drive to make it usable again. Assign a drive letter if needed by right-clicking and selecting “Change Drive Letter and Paths.” These steps can make undetected drives usable.
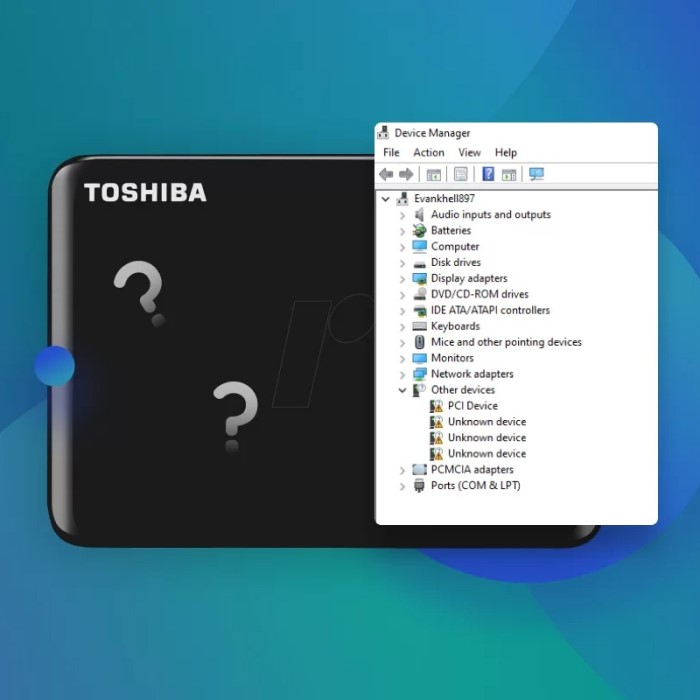
Troubleshooting with Device Manager
Access “Device Manager” through the Control Panel. Locate your hard drive under “Disk Drives” or “Unknown Devices.” Right-click the drive and select “Update Driver.” Follow instructions to update the driver. If this doesn’t work, uninstall the driver and restart the PC. The system will reinstall it automatically. This method often resolves incompatibilities or software-related recognition issues.
Running CHKDSK on the Drive
CHKDSK (Check Disk) scans for and fixes file system errors on your hard drive. Open Command Prompt as administrator. Type “chkdsk [Drive Letter]: /f” and press Enter. Replace [Drive Letter] with the appropriate letter for your hard drive (e.g., “D:”). Allow CHKDSK to complete its process. If the drive has logical errors, this tool can repair them and restore detectability.
Fixing a Hard Drive Not Showing Up on Mac
If your hard drive isn’t showing up on Mac, there are effective solutions to resolve the issue.
Checking in Disk Utility
Start by opening the Disk Utility from the Applications > Utilities folder. Locate your drive in the sidebar. If it appears but is greyed out, it may need mounting. Select the drive and click “Mount.” If the drive does not appear at all, it could indicate either physical damage or incompatible formatting. Use Disk Utility to identify the problem and proceed with repairs or formatting as needed.
Using First Aid to Repair the Drive
Disk Utility’s First Aid tool can fix common drive errors. Select the problematic drive in Disk Utility. Click the “First Aid” option on the top menu. Confirm by clicking “Run” when prompted. First Aid will scan and repair corrupted file systems or disk errors. If the tool repairs successfully, check if your drive is now visible. Repeat the process if additional errors are found.
Formatting the Drive for Compatibility
- Accessing Disk Utility:
- Open Disk Utility on your Mac by searching for it via Spotlight or finding it in the Applications folder under Utilities.
- Disk Utility is a built-in tool that allows you to manage disks and storage devices connected to your Mac.
- Selecting the Drive:
- In Disk Utility, locate the external drive in the left sidebar. Make sure to select the correct drive, as formatting will erase all existing data on it.
- If you’re unsure which drive to select, verify the size and any identifying information to ensure accuracy.
- Erasing the Drive:
- Click the “Erase” button at the top of the Disk Utility window. This initiates the formatting process.
- You will be prompted to choose a format for the drive. Select a compatible option such as APFS or Mac OS Extended (Journaled) from the dropdown menu.
- Naming the Drive:
- Enter a name for your drive in the name field; this will be how the drive appears in Finder and on your desktop.
- Naming the drive can help you identify it easily, especially if you have multiple drives connected.
- Setting the Partition Scheme:
- Ensure that the partition scheme is set to “GUID Partition Map.” This is necessary for compatibility with macOS and allows for proper functioning.
- The GUID Partition Map is particularly important for drives intended to be used as bootable drives or for advanced storage functionalities.
- Finalizing the Format:
- After confirming all settings, click on the “Erase” button again to proceed with the formatting process.
- This action will erase all existing data on the drive and format it according to your selected specifications.
What to Do If Your External Hard Drive Isn’t Recognized
Facing issues with an external hard drive not being recognized can be frustrating. Fortunately, several steps can resolve this problem effectively.
Ensuring Compatibility with Your Device
Confirm that your external hard drive is compatible with your computer. Check whether the drive supports your operating system (e.g., Windows or macOS). Ensure the file format used by the drive works with your device. For example, some drives formatted for macOS (APFS) may not be recognized on Windows without reformatting. Cross-check the device specifications of both your computer and the external hard drive.
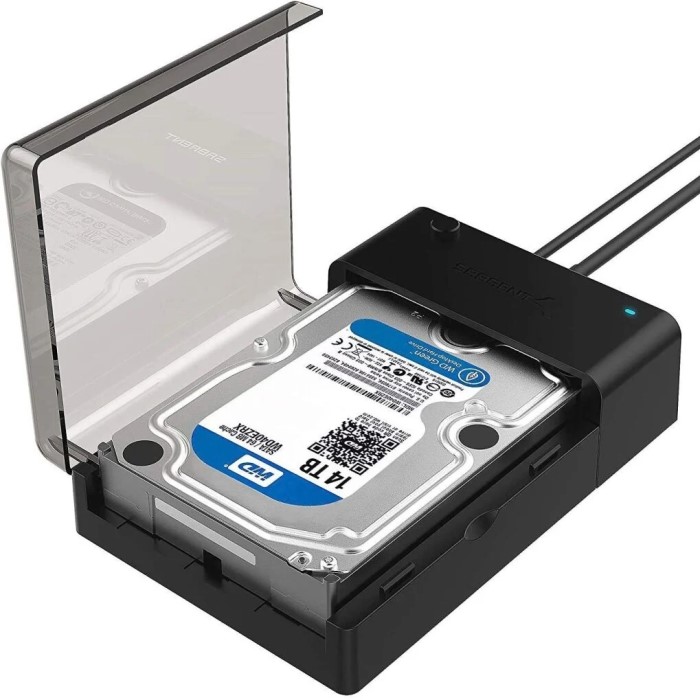
Testing Different Ports or Cables
Inspect the ports and cables used to connect the external hard drive. Use alternative USB or Thunderbolt ports to rule out port damage. Test the drive with a different cable to identify cable-related issues. If possible, try plugging the drive into another computer to see if it works. Faulty connections are often the reason external drives fail to appear.
Solving Power Supply Issues
- Correctly Connecting to Powered USB Ports:
- Make sure the external hard drive is plugged into a powered USB port on your computer or device. Some USB ports, especially those on the front of desktop computers, may not provide enough power.
- If available, use USB ports located directly on the motherboard at the back of the desktop for optimal power supply.
- Using External Power Supplies:
- If your external hard drive comes with an external power supply, ensure it is correctly connected and receiving power.
- Double-check the power supply’s connection to both the hard drive and the wall outlet to rule out connection issues.
- Verifying Independent Power Cables:
- For drives that utilize an independent power cable, it’s crucial to verify that the cable is firmly plugged into both the drive and the electrical outlet.
- Inspect the cable for any signs of damage or wear that might prevent it from providing adequate power.
- Observing Drive Indicators:
- Pay attention to any lights or indicators on the external hard drive. A blinking light may indicate that the drive is attempting to power on but is struggling due to insufficient power.
- Conversely, no lights may signify a complete power failure, prompting the need for troubleshooting.
- Utilizing Powered USB Hubs:
- If you continue to experience power issues, consider using a powered USB hub. These devices supply additional power to connected USB devices, ensuring your external hard drive receives sufficient energy.
- A powered USB hub can be particularly useful if multiple devices are connected and drawing power from a single USB port.
Data Recovery Options
When a hard drive becomes undetectable, recovering lost data is often critical. Below are effective data recovery options.
Using Recovery Software
Data recovery software can help restore files from an undetectable hard drive. Download and install a trusted recovery tool like EaseUS, Disk Drill, or Recuva. Launch the program on your computer. Select the undetected hard drive as the target device for scanning. The software will search for recoverable files and present them for rescue. Save retrieved files to a different drive to avoid overwriting data.
Consulting a Professional Data Recovery Service
If recovery software fails, seek help from professional data recovery services. These specialists use advanced tools to retrieve data from damaged or undetectable drives. Contacting a local data recovery center is often effective. Provide details about the drive and the issue you are facing. Professional services are recommended for severe physical damage or complex data loss situations.
Preventing Future Hard Drive Detection Issues
Avoiding hard drive detection problems requires consistent maintenance and proactive steps. Below are essential tips to protect your drive.
Regularly Updating Firmware
Keep your hard drive’s firmware and drivers up to date. Manufacturers release updates to fix bugs and improve compatibility. Regular updates ensure the drive works with the latest operating systems. Use the device manager or manufacturer’s software to check for updates. Install updates promptly to prevent detection issues.
Safeguarding Against Physical and Electrical Damage
Handle your hard drive carefully to avoid physical damage. Avoid dropping the drive or exposing it to moisture or heat. Use surge protectors to shield the device from power surges. Overvoltage can damage the internal components of the drive. Avoid using external hard drives in unstable environments to reduce risks.
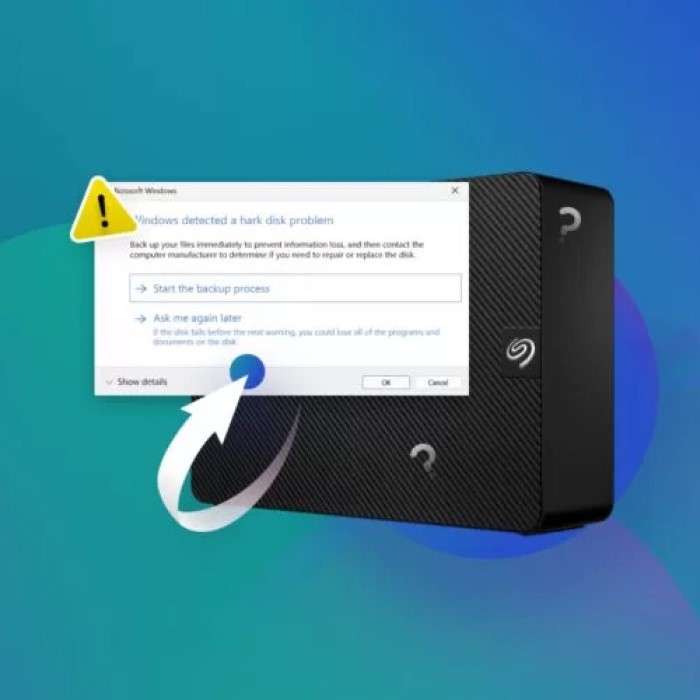
Regular Data Backups
Backing up data protects against unexpected hard drive failures. Use cloud services or external storage devices for backups. Schedule regular backups to minimize the risk of data loss. A backup can save vital files if the primary hard drive becomes undetectable. Always verify that backup systems are functioning properly.
Taking these preventive measures ensures the reliability and longevity. A well-maintained drive is less likely to encounter detection issues.
Conclusion
In conclusion, when facing the frustrating issue of “why is my hard drive not showing up?” understanding the potential reasons and remedies is vital. Start with basic connection checks and progress to software solutions if needed. Regular maintenance and awareness of disaster recovery options can significantly enhance your experience in managing hard drives. Keep these tips in mind, and you’ll be better equipped to handle any access issues that arise. If you follow this advice, you’ll enhance your system’s efficiency and reliability.