
Introduction: Importance of Cleaning Your Mechanical Keyboard
Cleaning a mechanical keyboard is essential for maintaining its performance and longevity. Over time, dust, crumbs, and oils accumulate between the keys, affecting functionality and hygiene. If you’re wondering how to clean a mechanical keyboard, you’re in the right place. This article will guide you through straightforward methods to ensure your keyboard remains in peak condition. We’ll cover essential cleaning techniques, tools, and tips, ensuring that you can tackle this task with confidence and ease.

Understanding Your Mechanical Keyboard
Before diving into the cleaning process, it’s important to understand the components of your mechanical keyboard. This understanding will help you clean it effectively without causing damage.
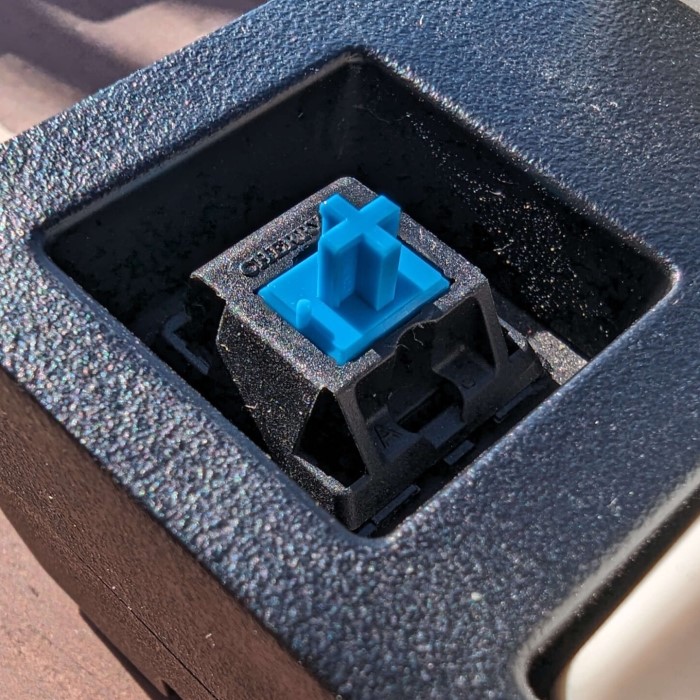
- Switch Mechanisms: Mechanical keyboards use individual switches for each key. These switches can vary in type and design, affecting how you should approach cleaning. Some models have removable switches, while others do not.
- Keycaps: The keycaps are the plastic covers that sit atop each switch. They can be easily removed for deep cleaning. However, it’s crucial to handle them carefully to avoid misplacing or damaging them.
- Casing and Circuit Board: The casing protects the keyboard’s internal components. Keeping it clean prevents dirt from affecting the circuit board and ensures a long lifespan.
Tools and Supplies Needed for Cleaning
To clean your mechanical keyboard effectively, gather the following tools and supplies:
Keycap Puller
- Purpose and Functionality: The keycap puller is a specialized tool designed to facilitate the safe removal of keycaps from a keyboard. This ensures that neither the keycaps nor the underlying switches are damaged during the process.
- Inclusion with Purchase: Many keyboards come with a keycap puller included in the package, making it readily available for users who want to customize or clean their keyboard.
- Accessory Option: If your keyboard does not include a keycap puller, it can be purchased separately as an accessory, which is generally inexpensive and widely available.
Compressed Air
- Debris Removal: Compressed air is a highly effective tool for blowing out dust, crumbs, and other debris that may be stuck between the keys of your keyboard.
- No Disassembly Required: One of the biggest advantages of using compressed air is that it allows you to clean your keyboard without having to disassemble it, saving time and effort while still achieving a thorough clean.
Microfiber Cloth
- Soft and Non-Scratching: A microfiber cloth is ideal for gently wiping down both the casing and keycaps of the keyboard. Its soft texture ensures that the surface will not be scratched or damaged during cleaning.
- Versatile Use: This cloth is also effective in picking up dust and fingerprints, leaving your keyboard looking clean and polished without needing any harsh chemicals.
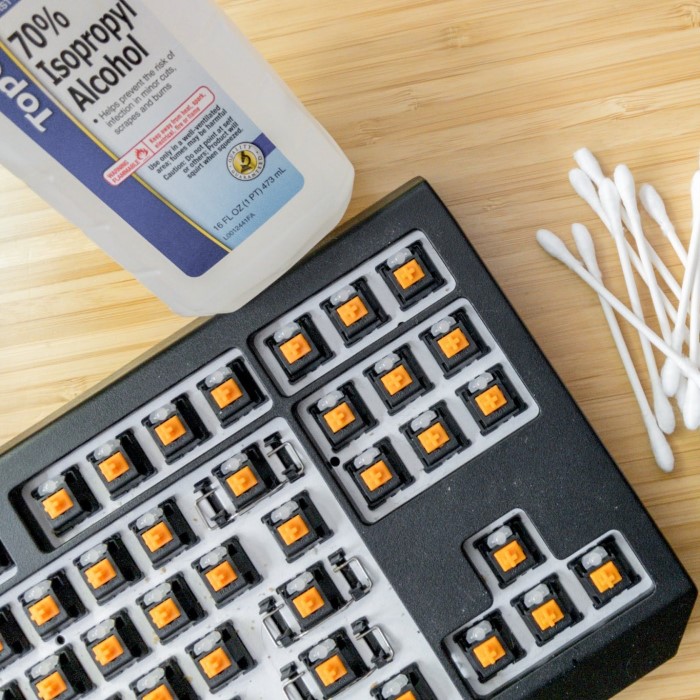
Isopropyl Alcohol
- Multi-functional Cleaner: Isopropyl alcohol serves as an efficient cleaning agent for disinfecting and removing stubborn grime from the keyboard’s surface.
- Safe for Plastic: One of the significant benefits of using isopropyl alcohol is that it effectively cuts through dirt and oils while being safe to use on plastic materials, ensuring that the keyboard’s finish is not compromised.

Cotton Swabs
- Reaching Tight Spaces: Cotton swabs are invaluable for cleaning the keyboard, as their slim design allows them to reach tight spaces and crevices that other cleaning tools may miss.
- Precision Cleaning: They are particularly useful for cleaning around the switches and between the keycaps, ensuring that all areas are free of dirt and residue.
Soft Brush
- Debris Dislodging: A small soft brush can be an effective tool for gently dislodging debris that may be stuck around the keys and switches, helping to keep the keyboard clean.
- Gentle Scrubbing Action: The soft bristles of the brush ensure that it can clean delicate areas without causing any damage to the keyboard or its components. This method is especially useful for larger particles that compressed air may not remove.
Step-by-Step Guide: How to Clean a Mechanical Keyboard
Step 1: Preparing for Cleaning
How to clean a mechanical keyboard? Before starting the cleaning process, ensure your keyboard is unplugged or, if it’s wireless, that the batteries are removed. Turning off the device is crucial for your safety and to prevent short circuits.
Step 2: Removing Keycaps
Using the keycap puller, carefully remove the keycaps from the keyboard. Start with one corner and work your way across. It’s a good idea to take a picture of the keyboard layout before removing the keys. This will help you reassemble it later correctly.
Step 3: Cleaning the Keycaps
Soak in Warm, Soapy Water
Start by preparing a bowl filled with warm water. Make sure the water is not too hot to avoid damaging the keycaps. Next, add a few drops of dish soap to the water; this will help break down grease and dirt. Once you have the soapy mixture ready, carefully remove the keycaps from your keyboard. Place the keycaps into the bowl, making sure they are fully submerged. Let them soak for approximately 30 minutes. This soaking time allows the soapy water to penetrate and loosen any grime or buildup that may have accumulated on the surfaces of the keycaps.
Scrub
After the soaking period, take a soft brush, such as a toothbrush or a designated cleaning brush, to gently scrub the keycaps. This step is crucial for removing any stubborn stains or debris that may not have come off during soaking. Focus on areas where dirt tends to accumulate, such as around the edges and in the crevices. Be gentle during this process to avoid scratching or damaging the plastic material of the keycaps. A delicate touch will help preserve their appearance while ensuring they are cleaned effectively.
Rinse and Dry
Once you have thoroughly scrubbed the keycaps, it’s time to rinse them off. Hold the keycaps under warm running water to wash away any soap residue. It’s important to ensure that all soap is removed, as leftover soap can leave a film on the keycaps or cause irritation to your skin when you use the keyboard later. After rinsing, place the keycaps on a towel to dry. Make sure they are evenly spaced out so air can circulate around them. Allow them to dry completely; this step is particularly crucial since any trapped moisture can lead to damage when the keycaps are reattached to the keyboard. Double-check that each keycap is thoroughly dry before considering them ready for reinstallation.
Step 4: Cleaning the Keyboard Base
Blow Away Debris
- Utilize Compressed Air: Grab a can of compressed air, which is an effective tool specifically designed to dislodge dirt and particles from tight spaces.
- Target the Dust and Crumbs: Aim the nozzle of the compressed air at the gaps between the keys on your keyboard to effectively blow out any accumulated dust or food particles.
- Inverted Position: To facilitate the removal of debris, turn the keyboard upside down. This will help gravity assist in dropping the dislodged debris out of the keyboard.
Wipe Down with Alcohol
- Select the Right Cloth: Use a clean microfiber cloth that won’t scratch the surface of your keyboard. Ensure it is dry and free from any prior contaminants.
- Dampen with Isopropyl Alcohol: Lightly moisten the cloth with isopropyl alcohol. Be cautious not to soak it, as excess liquid could seep into the keyboard and damage the internal components.
- Focus on the Keyboard Base: Gently wipe down the surface of the keyboard, giving special attention to the areas surrounding the switches, where grime and oils tend to accumulate.
Use Cotton Swabs
- Get Cotton Swabs Ready: Take a few cotton swabs, which are perfect for reaching narrow spaces that a cloth cannot access.
- Dip in Alcohol: Lightly dip the cotton swabs in isopropyl alcohol for effective cleaning while ensuring they are not dripping wet.
- Carefully Clean Around Each Switch: With precision, use the alcohol-dipped swabs to clean around each individual switch, meticulously removing any dirt or residue that has built up in the tight gaps.
Step 5: Reattaching Keycaps
Once everything is dry, it’s time to reattach your keycaps. Start from one corner and gently press each keycap back onto its respective switch. Ensure they are secure.
Step 6: Final Inspection and Testing
After reassembling, inspect your keyboard for any remaining debris. Plug it back in and test each key to ensure proper functionality.
Step 7: Regular Maintenance
To maintain your keyboard’s condition:
- Regularly blow out dust with compressed air.
- Clean keycaps every few months.
- Wipe the keyboard surface weekly to prevent buildup.
Common Questions about Mechanical Keyboard Cleaning
How to clean a 60% mechanical keyboard?
Cleaning a 60% mechanical keyboard follows the same steps as a full-sized keyboard. However, make sure to familiarize yourself with the compact layout, as some keys may have different functions and placements. Use a keycap puller, and take care when removing keycaps to avoid confusion during reassembly.
How often should I clean my mechanical keyboard?
The frequency of cleaning a mechanical keyboard depends on usage and environment. Generally, cleaning every three to six months is advisable for standard users. Gamers or those who snack at their desks should consider cleaning more frequently, possibly every month.
What are the 7 steps to clean a keyboard?
- Prepare for cleaning: Unplug and turn off the keyboard.
- Remove keycaps carefully using a keycap puller.
- Soak keycaps in warm, soapy water.
- Clean the keyboard base using compressed air and alcohol.
- Clean around switches with cotton swabs.
- Reattach dry keycaps securely.
- Regularly maintain the keyboard to keep it clean.
Will water ruin a mechanical keyboard?
Water can ruin a mechanical keyboard if it seeps into the switches or circuit board. Always dampen cloths with cleaning solutions rather than soaking them. Avoid putting the entire keyboard in water, and ensure everything is completely dry before reassembly.
Conclusion: Keep Your Mechanical Keyboard Clean and Functional
Now you know how to clean a mechanical keyboard using quick and easy methods. By regularly maintaining your keyboard, you can enhance its performance and longevity while keeping your typing experience pleasant. Remember to gather the right tools and follow the steps outlined in this guide. Cleaning might seem intimidating initially, but with practice, it will become a simple part of your keyboard care routine. Your keyboard deserves attention, and a little effort can go a long way in preserving its quality and functionality. Happy cleaning!