Introduction: The Importance of Ejecting Hard Drives
Understanding how to eject hard drive from PC is essential for anyone who uses external storage devices. Ejecting your hard drive properly ensures that your data remains intact and minimizes the risk of file corruption or data loss. When you connect an external hard drive to a computer, it creates a link between the device and the operating system. Over time, this connection can lead to complications if not handled appropriately during disconnection.
This article will serve as a comprehensive guide to safely ejecting hard drives from your PC. You will learn the proper steps to take, the reasons why ejecting is critical, and common issues users face when attempting to disconnect their drives. Whether you are a beginner or someone familiar with technology, these essential tips will help you enhance your experience while using external hard drives.
Understanding the Risks of Improper Ejection
Data Integrity and Protection
When you improperly eject an external hard drive, you risk corrupting any open files. Whenever you are transferring data or even just using files stored on the drive, your operating system needs to perform various read and write processes. If you disconnect the drive without properly ejecting it, the following risks arise:
- Data Loss: Any files in the process of being written may not be saved.
- Corruption of Files: Corrupted files may not open properly, making them unusable.
- Drive Damage: Continual improper ejection can lead to hardware issues over time, requiring costly repairs or replacements.
Thus, understanding how to eject your hard drive correctly can save you from these issues.
Operating System Conflicts
Each operating system handles external drives differently. For instance, Windows uses a “plug and play” system, automatically enabling your hard drive when connected. On the other hand, macOS performs additional checks to ensure that all data transactions are completed before unmounting the drive. Users may encounter varying results depending on how these systems manage external drives.
The differences highlight the importance of knowing how to eject hard drive from PC correctly depending on the operating system you are using.
Ejecting a Hard Drive from a Windows PC
Manual Ejection Steps
How to eject hard drive from pc? For Windows users, ejecting a hard drive is straightforward. Follow these steps to ensure a proper ejection:
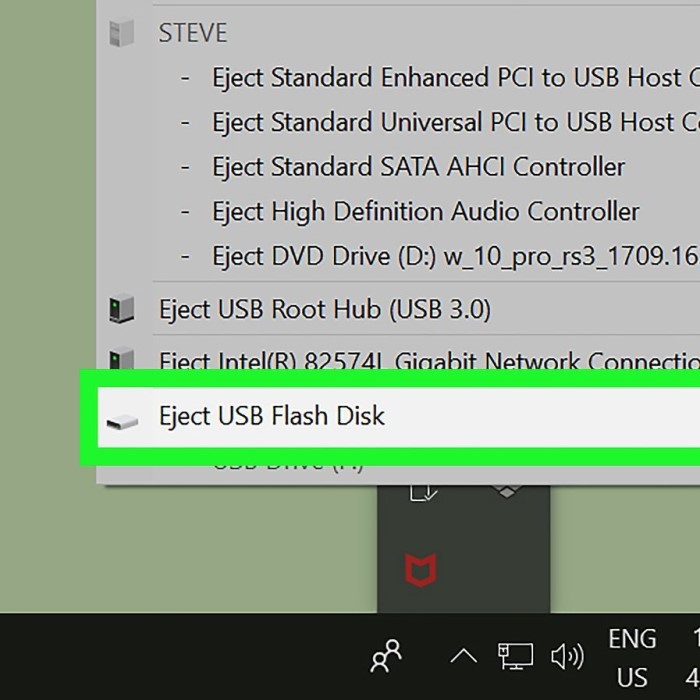
- Locate the Taskbar: Find the USB icon in the system tray on the bottom right corner of your screen. It usually looks like a small USB plug with a checkmark.
- Click on the Icon: When you click on the USB icon, a menu will appear showing the connected devices.
- Select Your Drive: Highlight the external hard drive you want to eject. It’s essential to ensure you choose the correct drive to avoid accidentally disconnecting your primary storage.
- Eject the Drive: Click on the “Eject” option that appears next to your external hard drive. Wait for the message confirming that it is safe to remove the device before physically unplugging it.
- Remove the Cable: Once the confirmation appears, you can safely disconnect the USB cable.
Using these steps reduces the risk of data loss or corruption significantly.
Alternative Ejection Methods
In addition to the manual process, Windows users may also eject drives directly from File Explorer:
- Open File Explorer: Navigate to your external hard drive listed under “This PC.”
- Right-Click the Drive Icon: Choose the drive you want to eject.
- Select Eject: Click on “Eject,” and a confirmation message will display when it is safe to remove the drive.
This method is helpful for those who prefer using graphical interfaces rather than system tray icons.
Ejecting a Hard Drive from a Mac
Manual Ejection Steps
Mac users have a slightly different approach to ejection, leveraging the intuitive features of macOS. Follow these instructions:
Find the External Drive Icon
- Begin by looking for the external hard drive icon on your desktop. It should appear prominently among your files and shortcuts.
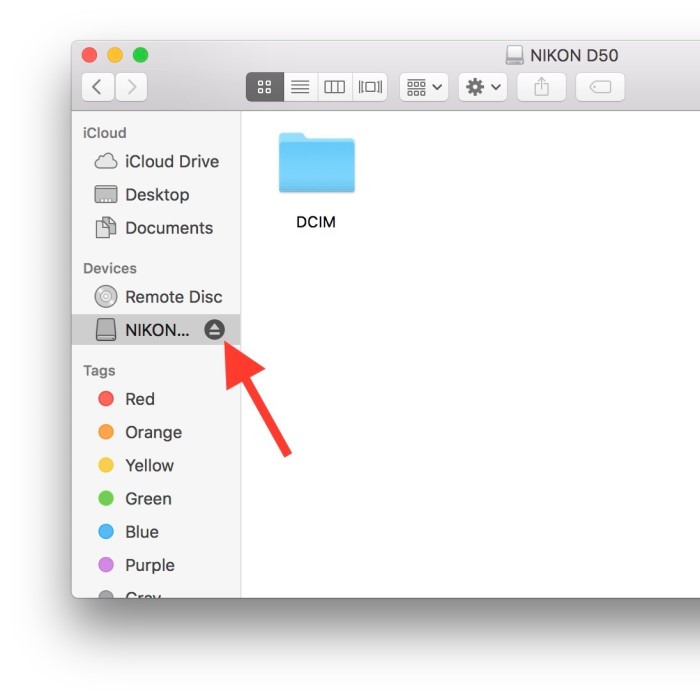
- If the icon is not visible, do not worry. Open a Finder window by clicking the Finder icon in your dock.
- Once the Finder window is open, glance at the sidebar on the left. Look for your external hard drive listed there. This will help you locate the drive even if it doesn’t appear on the desktop.
Ejecting from the Desktop
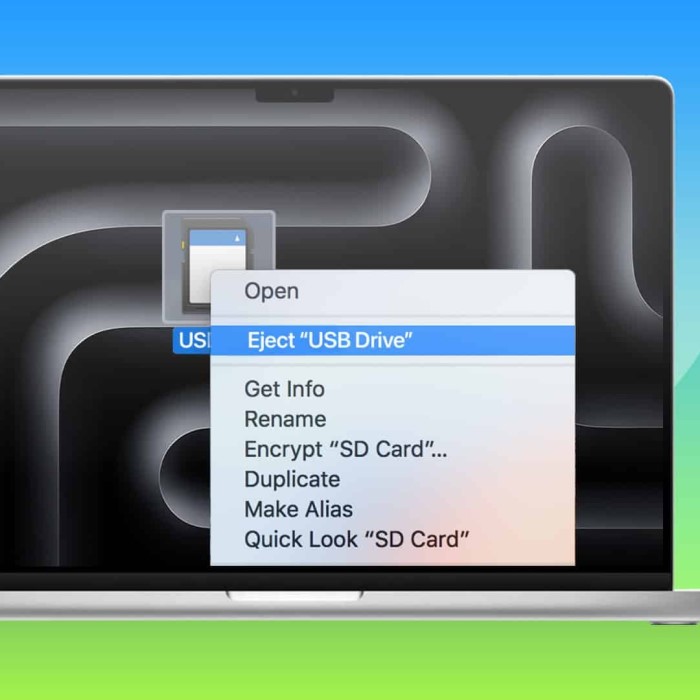
- Once you’ve found the external drive icon, proceed to right-click on it. If you are using a one-button mouse or trackpad, you can Control-click instead.
- From the context menu that appears, select the option labeled “Eject.” This action tells your Mac to prepare the drive for safe removal.
- Alternatively, you can use a more visual method. Click and hold the drive icon, then drag it to the Trash icon located in your dock. Watch closely as the Trash icon changes into an “Eject” icon while you drag the drive over it.
Wait for Disconnection Confirmation
- After you’ve initiated the ejection process, macOS will begin performing checks. These checks ensure that all ongoing data transactions are complete.
- Remain patient as the system processes this request. A notification will eventually appear on the screen, confirming that the drive has been safely ejected.
- Once the notification displays, it means that the drive is no longer mounted and is safe to physically disconnect.
Unplug the Cable
- Once you receive the confirmation notification, it is time to disconnect the external hard drive.
- Gently grasp the USB cable connected to the drive, ensuring you have a firm grip on the cable rather than pulling on the drive itself.
- Slowly and carefully unplug the cable from your computer. Following this process will help prevent any potential damage to both the drive and the USB port.
Using Disk Utility for Ejection
For more advanced users, macOS also offers a method through Disk Utility:
- Open Disk Utility: You can find it in Applications > Utilities.
- Select the Drive: From the left-hand sidebar, locate and select the external drive you wish to eject.
- Click the Eject Button: In the Disk Utility interface, there is an eject button at the top. Clicking this ensures the drive is properly unmounted.
This method provides a detailed overview of all connected drives, making it easier to troubleshoot if necessary.
Common Issues When Ejecting Hard Drives
Unable to Eject the Drive
How to eject hard drive from pc? Sometimes, users may find that they’re unable to eject their external drives, even after following the proper steps. This can occur due to several reasons:
- Files Still in Use: If any applications are accessing files on the drive, it cannot be ejected. Users should close any programs or files being used before attempting to eject.
- System Processes: Certain background processes may still be interacting with the drive. Task Manager (Windows) or Activity Monitor (Mac) can help you identify such processes.
- Corrupted Files: If the drive’s file system is corrupted, the ejection process may fail. Running repairs (like CHKDSK on Windows) can resolve such issues.
Can You Just Unplug an External Hard Drive?
While it may be tempting to simply unplug the external hard drive, doing so poses several risks. Unplugging the drive without ejecting it properly can lead to data corruption and potential hardware damage. Therefore, adhering to safe ejection practices is crucial.
Understanding Ejecting vs. Unmounting
Does Unmount Mean Eject?
The terms “eject” and “unmount” are often used interchangeably. However, in technical contexts, unmounting refers to making the drive inaccessible to the operating system, while ejecting implies that the external drive is also physically removed. When you unmount a drive, it prepares the file system for removal, ensuring that all pending input/output operations are complete.
Best Practices for Ejection and Unmounting
- Always Eject or Unmount: Whether using a Mac or PC, always follow the process of ejecting or unmounting before physically disconnecting the drive.
- Close Applications: Ensure all applications that may be using the drive are closed.
- Regular Backups: Conduct regular backups of data stored on external drives to prevent data loss.
FAQs About Ejecting Hard Drives
How do I remove a hard drive from a PC?
To safely remove a hard drive from a PC, follow the ejection process outlined above. Use the USB icon in the taskbar, or access Disk Management to properly eject the drive.
Can you just unplug an external hard drive?
No, unplugging an external hard drive without ejecting it first increases the risk of data corruption and hardware damage. Always follow proper ejection procedures.
Why can’t I eject an external drive?
You may be unable to eject an external drive if files are still in use, if system processes are active, or if the file system is corrupted. Closing applications or running repair utilities can help.
Does unmount mean eject?
Unmounting a drive prepares it for removal, effectively making it inaccessible to the operating system. Ejecting typically means unmounting and physically disconnecting the drive, ensuring safety.
Conclusion: Mastering Hard Drive Ejection
In summary, mastering how to eject hard drive from PC is critical for data integrity and device longevity. By following the guidelines for both Windows and Mac systems, users can ensure that their external drives remain functional and preserved. Proper ejection methods not only protect your data but also prolong the life of the drive and maintain overall system performance.
As you engage with your external drives, remember to utilize the outlined tips and best practices. Ejecting and unmounting are simple yet vital processes that can save you from frustration and data loss. So, the next time you connect or disconnect your external hard drive, keep these essential tips in mind, and enjoy your enhanced computing experience!