Introduction
Docking stations provide a convenient way to expand the functionality of your laptop. They act as a central hub for connecting additional devices like monitors, keyboards, and other peripherals. Lenovo docking stations enhance productivity and simplify workspace management.
What is a docking station and its purpose?
A docking station connects your laptop to multiple peripherals through a single setup. It eliminates the need for individual cables, saving time and effort. With a docking station, you can instantly switch to a full desktop setup. It is ideal for professionals who work on multiple screens or use various external devices daily.
Key features of Lenovo docking stations
- Universal Connectivity: Lenovo docking stations support USB-C, Thunderbolt, and legacy ports for versatility.
- Compact Design: They feature space-saving designs to fit seamlessly into any workspace.
- Multi-Monitor Support: Many docking stations allow connection with multiple monitors for enhanced productivity.
- Fast Data Transfer: Thunderbolt 3 docks enable lightning-fast data transfer rates.
- Advanced Power Delivery: Some models charge your laptop and other devices simultaneously.
- Ease of Use: Plug-and-play functionality ensures you can start working quickly without complicated setups.
Benefits of Using
Lenovo docking stations provide several key benefits that enhance your workspace and productivity. They simplify device connections and streamline daily workflows.
Enhancing productivity with multiple screens
Using multiple screens boosts efficiency and allows for better multitasking. Lenovo docking stations support multi-monitor setups, which are perfect for professionals managing complex tasks. With additional monitors, you can compare documents, analyze data, and run multiple applications simultaneously. This setup reduces the need to switch between tabs or windows, saving valuable time. Models like the Lenovo Thunderbolt 3 Dock excel in multi-screen capability, ensuring smooth workflow transitions.
Reducing cable clutter and improving workspace organization
Cable clutter can disrupt your workspace and hinder focus. Lenovo docking stations solve this by consolidating all connections into one hub. Instead of multiple plugs and adapters, a single docking station connects your peripherals. This streamlined setup keeps desks tidy and organized, enhancing workspace aesthetics. A clean environment promotes better concentration and creates a professional atmosphere. By using a Lenovo docking station, you can maintain both functionality and minimalism in your workspace.
Types of Lenovo Docking Stations
Lenovo offers various docking station types to meet different user needs. Understanding these types is vital for selecting the right one for your laptop and workflow.
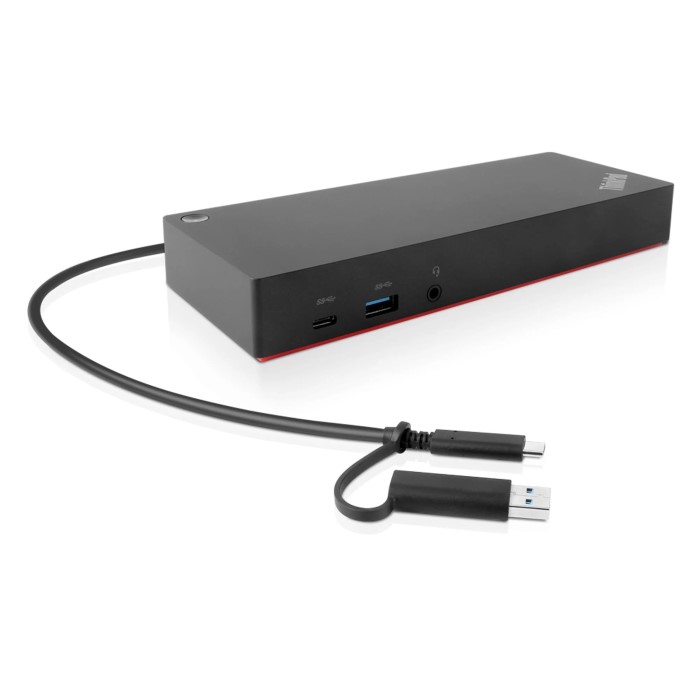
USB-C docking stations
USB-C docking stations are a versatile choice for modern laptops. They support fast data transfer and a wide range of connectivity options. These docks let you connect external monitors, keyboards, mouse, and other crucial peripherals with ease. Plus, they often feature power delivery, allowing simultaneous laptop charging. Popular among professionals, they provide seamless portability and functionality in a compact design.
Thunderbolt docking stations
Thunderbolt docking stations offer superior speed and performance. Ideal for power users, they support multiple high-resolution monitors and intensive data transfers. These stations utilize Thunderbolt 3 or Thunderbolt 4 technology to deliver exceptional bandwidth. They are perfect for video editing, 3D rendering, and other demanding workflows. Advanced power delivery ensures your laptop stays charged during heavy use.
Legacy docking solutions for older Lenovo laptops
Legacy docking solutions are tailored for older Lenovo laptops. These include docks with proprietary connectors designed for ThinkPad models. They ensure compatibility and extend the life of older devices. Legacy options may lack USB-C or Thunderbolt, but they still offer reliable connectivity. They are a cost-effective solution for users with traditional Lenovo laptops who need extended functionality.
How to Check Lenovo Docking Station Compatibility
Choosing the right Lenovo docking station is critical for an efficient setup. Ensuring compatibility with your laptop guarantees seamless connectivity and performance. Here’s how you can verify compatibility effectively.
Identifying ports and connectivity options on your laptop
Start by examining the ports available on your laptop. Common ports include USB-C, Thunderbolt, HDMI, and USB-A. Identify whether your device supports modern standards like USB-C or Thunderbolt. Older models may rely on proprietary connectors specific to Lenovo ThinkPads.
Check your laptop’s user manual or Lenovo’s website to confirm the supported ports. Take note of any specific requirements, such as power delivery standards or display resolutions. This will help in narrowing down compatible docking station options.
Additionally, consider your workflow needs. For example, if you need multiple monitors, check if your laptop supports display expansion. Having a clear idea of required connections ensures you select the right docking station with the necessary features.
Using Lenovo’s compatibility tools and resources
Lenovo provides online tools and resources to help users identify compatible docking stations. Visit Lenovo’s docking station compatibility page to find information specific to your laptop model. You can search by laptop series or input your laptop’s serial number.
These tools simplify the process and provide accurate compatibility recommendations. Lenovo also offers detailed specifications for each docking station model. This includes supported ports, power delivery ratings, and multi-monitor capabilities. Use these resources to confirm compatibility before purchasing.
For further assistance, Lenovo’s customer support team can provide personalized recommendations. They can help address uncertainties about older or less common laptop models. By leveraging Lenovo’s tools and support, you ensure a worry-free docking station selection process.
Popular Lenovo Docking Stations and Their Features
Lenovo offers several docking stations tailored to different user needs. Each model delivers unique features.
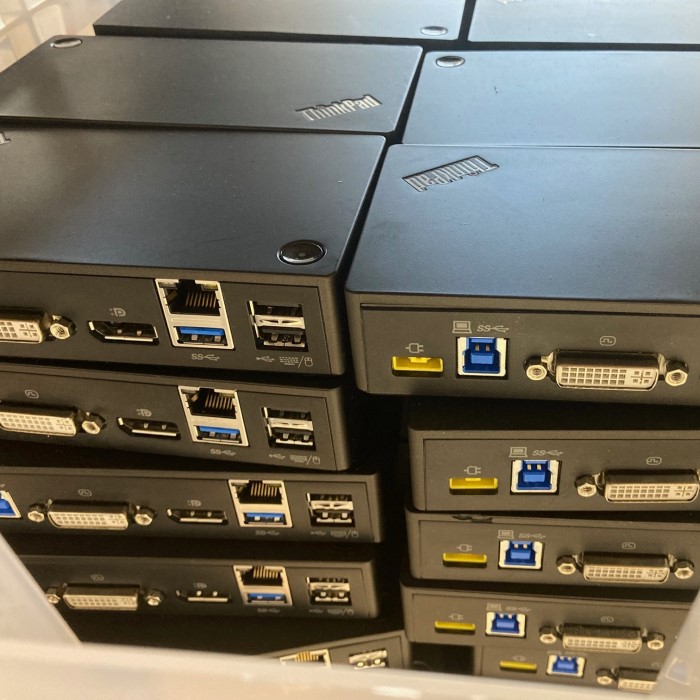
Lenovo ThinkPad Pro Dock
The ThinkPad Pro Dock is ideal for traditional Lenovo laptop users. It supports older ThinkPad models with proprietary connectors. This dock enables seamless connectivity, extending the life of older devices. It offers reliable performance with multiple ports, including USB-A, Ethernet, and video output options. Its compact design fits neatly into workspaces, making it practical for office setups.
Lenovo Thunderbolt 3 Dock
The Thunderbolt 3 Dock is designed for high-performance laptops. It supports advanced workflows like video editing and 3D rendering. With Thunderbolt 3 technology, this dock delivers top-speed data transfers and multi-monitor compatibility. Users can connect up to two 4K monitors or one 5K monitor for enhanced screen clarity. Its advanced power delivery keeps laptops charged during intensive tasks. Professionals who need robust features and fast performance will find this dock invaluable.
Lenovo USB-C Mini Dock
The USB-C Mini Dock is compact and travel-friendly. It is perfect for modern laptops with USB-C ports. Despite its small size, this dock includes multiple ports, such as HDMI, USB-A, and Ethernet. It supports essential peripherals and power delivery, making it versatile for day-to-day tasks. Its lightweight design ensures easy portability, ideal for remote work setups or on-the-go professionals.
Installation and Setup
Setting up your Lenovo docking station is a straightforward process. Follow these simple steps to get started and troubleshoot any issues that may arise during installation.
Step-by-step setup guide
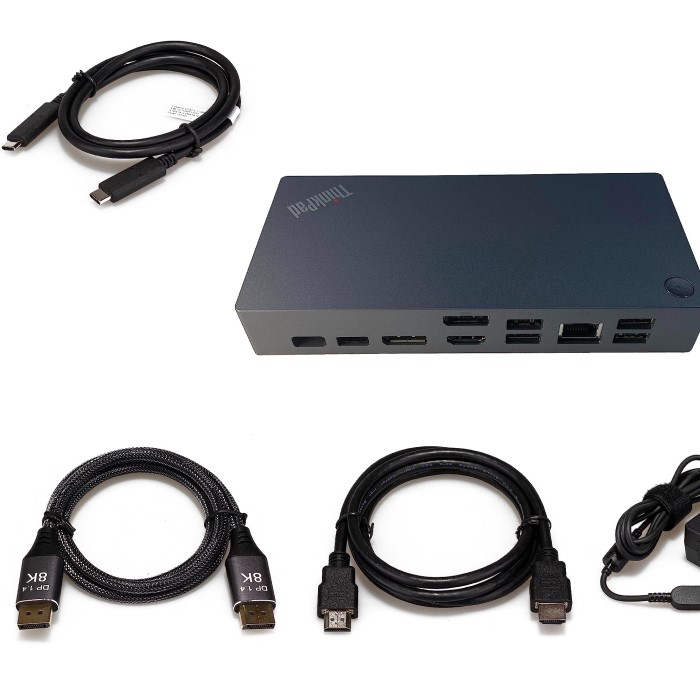
Unbox the Docking Station and Accessories
- Carefully Open the Box: Begin by releasing any seals or tape on the packaging. Use a sharp but safe tool, such as scissors or a box cutter, to carefully open it without damaging the contents.
- Remove Components: Take out the docking station itself along with the power adapter and any cables included in the box. Ensure that you organize these items to avoid misplacing any components during setup.
- Check for Accessories: Look for additional accessories that may have come with the docking station, such as manuals, warranty information, or installation guides. Familiarizing yourself with these documents can help streamline the setup process.
- Inspect for Damage: Before proceeding, check each component for any visible damage that may have occurred during shipping. If you notice any issues, contact customer support for assistance.
Position the Docking Station
- Choose a Stable Surface: Find a solid and flat surface, such as a desk or table, where you plan to set up the docking station. Ensure the area is clean and free from clutter to facilitate a smooth installation.
- Proximity to Laptop: Position the docking station within easy reach of your laptop for convenience. Placing it close will make it easier to connect and disconnect devices as needed.
- Consider Cable Management: Organize the area to minimize cable tangling and clutter. This may include using clips or ties to keep cables neat and out of the way, enhancing your workspace’s aesthetics.
- Leave Space for Ventilation: Check that there is enough space around the docking station for ventilation. Keeping it well-ventilated helps prevent overheating during operation.
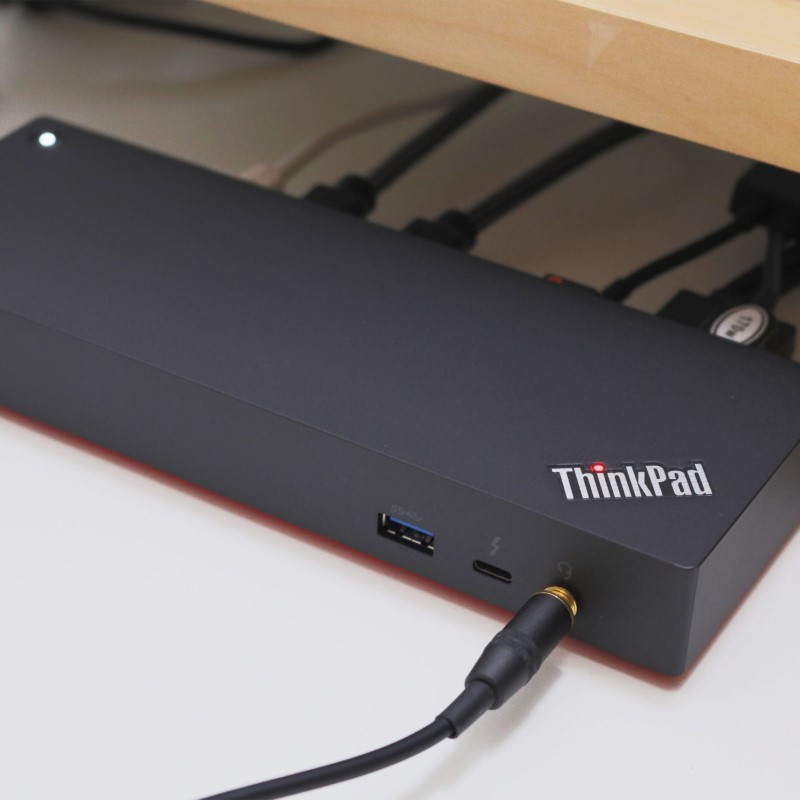
Connect the Power Supply
- Locate the Power Input: Find the designated power input port on the docking station, usually located on the back or side.
- Plug into Electrical Outlet: Connect the docking station’s power cable to an electrical outlet that’s easily accessible. Ensure that the outlet is functioning properly before proceeding.
- Attach Power Cable to Dock: Insert the other end of the power cable into the docking station, ensuring a secure connection to avoid interruptions during use.
- Check for LED Indicators: Many docking stations have LED indicators that light up when the power is connected successfully. Verify that these lights are on, which indicates that the dock is receiving power.
Connect Your Laptop
- Identify the Appropriate Cable: Determine which connection cable is best for your laptop, typically USB-C or Thunderbolt. Check your laptop’s ports and ensure compatibility with the docking station.
- Connect to the Dock: Plug one end of the chosen cable into the docking station and the other end into the corresponding port on your laptop. Ensure that both connections are secure and well seated.
- Ensure Correct Orientation: When plugging in, pay attention to the orientation of the connectors to avoid damaging the ports. Never force a connector if it doesn’t fit easily.
- Monitor Connections: Observe the indicators on the docking station for confirmation that the connection to your laptop has been established.
Attach Peripherals
- Locate Docking Station Ports: Review the available ports on the docking station. Common ports include HDMI, DisplayPort, USB-A, USB-C, and audio jacks.
- Connect External Monitors: Use HDMI or DisplayPort cables to connect any external monitors. Ensure the monitors are powered on and configured to the correct input settings.
- Connect Input Devices: Plug in your keyboard, mouse, and any other peripherals like printers or external drives into the USB ports on the docking station.
- Organize Your Setup: Arrange the cables for these devices to minimize tangles and maximize accessibility. Consider labeling cables if you have multiple devices connected for easier identification.
Turn on the Laptop
- Ensure Laptop is Powered Off: Before turning your laptop on, ensure that it is completely powered off or in sleep mode. This ensures a smooth detection process.
- Press the Power Button: Turn on your laptop by pressing the power button. Allow it to boot up fully to enable detection of the connected docking station.
- Observe for Startup Notifications: Some laptops may display notifications indicating that a new hardware device has been connected once it detects the docking station.
Install Drivers if Needed
- Automatic Recognition: Upon startup, your laptop may automatically recognize the docking station and install any necessary drivers without further action needed.
- Manual Installation Process: If your laptop does not recognize the dock, visit Lenovo’s official website to download the latest drivers. Look for the support section and enter your docking station model for guidance.
- Follow Installation Instructions: Once the drivers are downloaded, follow the provided instructions for installation. This typically involves running the downloaded file and following on-screen prompts.
- Restart Your Laptop: After installation, restart your laptop to ensure all changes take effect and the docking station is fully integrated into the system.
Test All Connections
- Check Monitor Functionality: Verify that the external monitors are displaying accurately and extending the display as intended. Adjust display settings in your laptop’s control panel if necessary.
- Test Peripherals: Ensure that all connected devices, including the keyboard, mouse, and any additional peripherals, function properly. This step ensures that each device is communicating correctly through the docking station.
- Adjust Settings if Needed: If any devices are not working, check settings in your laptop to troubleshoot connection or configuration issues. You may need to check port assignments or device manager settings.
- Final Review: Conduct a final review of all connections to confirm that everything is properly set up and functioning. Make any adjustments as necessary for optimal performance in your workspace.
By following these steps, you can quickly set up your Lenovo docking station for optimal use.
Troubleshooting common connection issues
- Laptop not detecting the docking station:
- Ensure the docking station is powered on and securely connected to the laptop.
- Check that the correct cable type (USB-C, Thunderbolt, etc.) is being used.
- Restart your laptop to reset the connection.
- No display on external monitors:
- Verify the monitor is powered on and properly connected to the docking station.
- Check your display settings to ensure external screens are enabled.
- Update your laptop’s graphics and docking station drivers.
- Peripherals not working:
- Test the USB ports by connecting a different device.
- Unplug and reconnect the affected device.
- Confirm the drivers for peripherals are installed correctly.
- Docking station not powering the laptop:
- Ensure the docking station supports power delivery for your laptop model.
- Double-check the power adapter is securely plugged into both the dock and outlet.
- Unexpected disconnections:
- Avoid loose connections by securely plugging in all cables.
- Replace faulty cables if frequent disconnections occur.
By addressing these common issues, you can maintain an efficient and uninterrupted docking station setup.
Frequently Asked Questions
Can I use a Lenovo docking station with non-Lenovo laptops?
Yes, many Lenovo docking stations offer universal compatibility. Models like the USB-C and Thunderbolt docks work with most laptops. However, compatibility depends on your laptop’s ports and specifications. For example, USB-C docks require laptops with USB-C ports, while Thunderbolt docks need Thunderbolt support.
Before purchasing, check your laptop’s user manual or specifications. Ensure that it supports the docking station’s features, such as power delivery or multi-monitor setups. Using Lenovo’s online compatibility tools can also provide guidance. These tools show whether a specific Lenovo dock can pair with your non-Lenovo laptop. Finally, contact customer support if you need personalized compatibility assistance.
How to update docking station drivers?
Updating drivers ensures optimal docking station performance. Follow these steps to update your Lenovo docking station drivers:
- Visit Lenovo’s support website: Open Lenovo’s official support page on your browser.
- Search for your docking station model: Enter the name or model number of your dock.
- Download the latest drivers: Locate the driver section and download the latest version for your operating system.
- Install the drivers: Open the downloaded file and follow on-screen instructions to complete installation.
- Restart your laptop: After installation, restart your laptop to finalize updates and ensure functionality.
Some laptops may also automatically update dock drivers through system updates. Check your device settings to enable automatic updates if needed. Regularly updating drivers prevents connection issues and improves overall performance.
Conclusion
Selecting the right Lenovo docking station is essential for enhancing your productivity and convenience. Consider your laptop’s port type, usage needs, and daily tasks before deciding. For modern laptops, USB-C docking stations provide excellent balance and compatibility. Thunderbolt docking stations work best for power users managing demanding tasks. For older Lenovo laptops, legacy solutions offer reliable connectivity at a lower cost.
Evaluate the number of peripherals and monitors you need to connect. Check whether the docking station supports essential features like power delivery or high resolution displays. Use Lenovo’s online compatibility tools to confirm your laptop’s compatibility. Alternatively, contact Lenovo’s customer support for detailed guidance.
A proper docking station simplifies your workspace, reduces cable clutter, and boosts overall productivity. Choose a Lenovo docking station designed for your specific needs and transform your laptop usage experience.