Understanding the Switch Lite Joystick Replacement
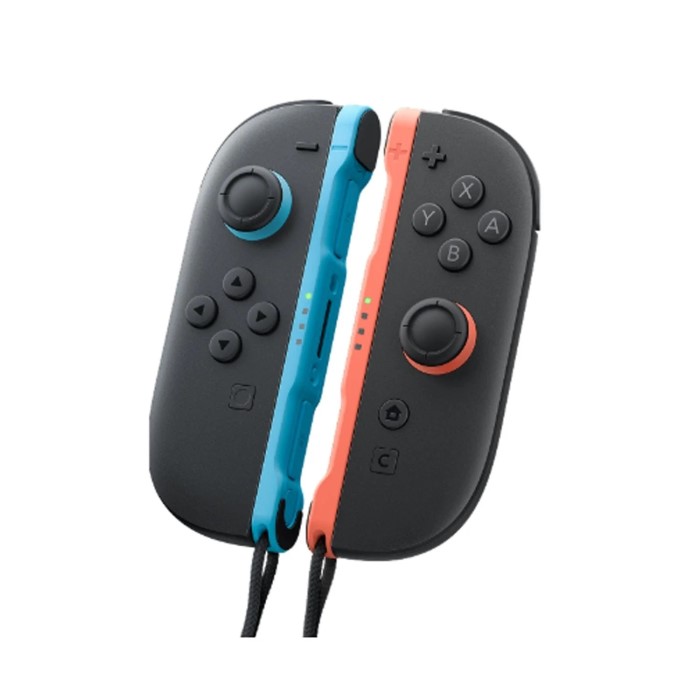
The Nintendo Switch Lite offers a unique gaming experience, specially designed for handheld play. However, like any gaming device, it is not immune to wear and tear. One of the most common issues faced by users is joystick malfunction. A faulty joystick can significantly hinder your gaming performance, making a switch lite joystick replacement a timely necessity. In this article, we will explore effective solutions for replacing your Switch Lite joystick, ensuring that you can enjoy ultimate comfort while playing your favorite games.
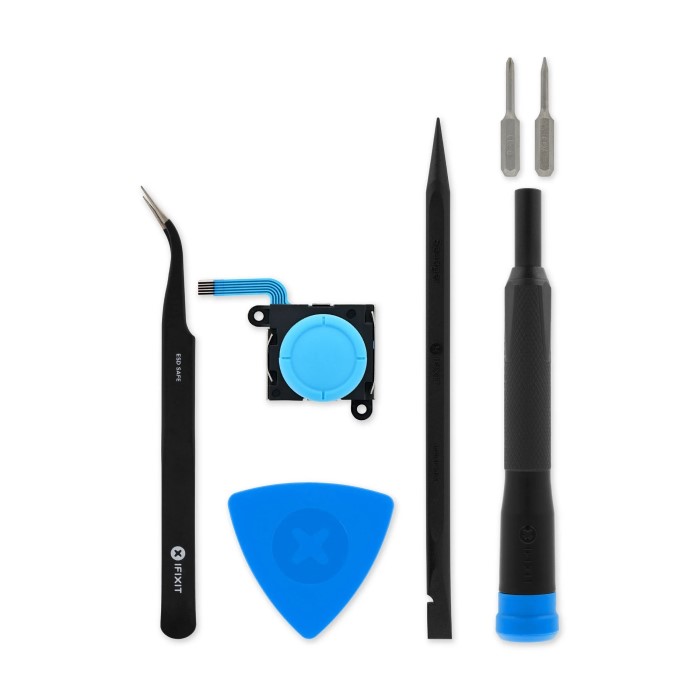
Tools Needed for Joystick Replacement
Replacing a Switch Lite joystick requires specific tools for a smooth and safe process. Proper preparation with the right tools will help prevent damage to your console during the repair.
Essential Tools for the Process
- Small Phillips Screwdriver: Used for removing and reattaching screws.
- Tweezers: Helps with small components and cables inside the console.
- Plastic Opening Tools: Prevents scratches and damage when opening the Switch Lite.
- Spudger Tool: Assists in disconnecting cables without harm.
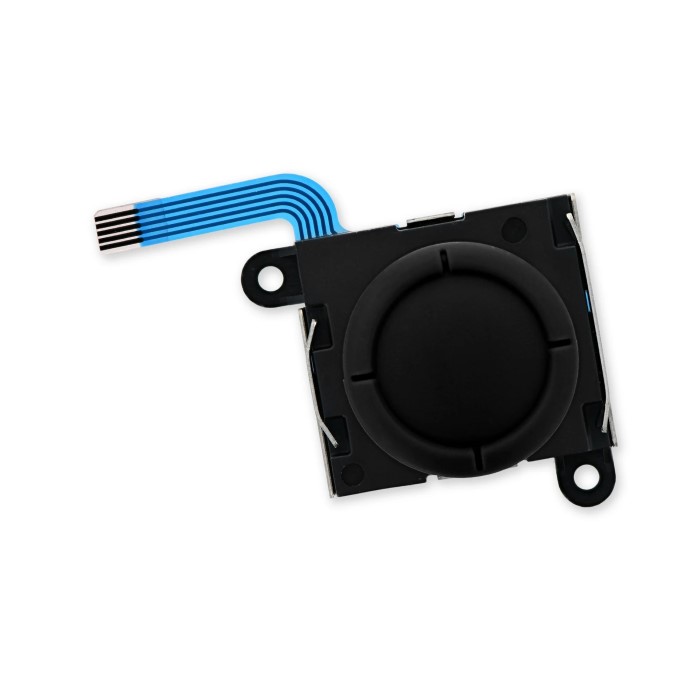
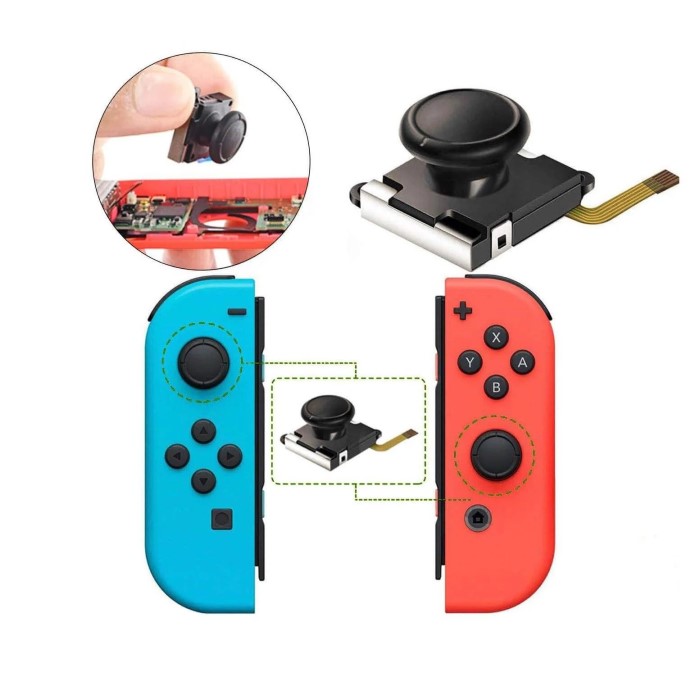
- Replacement Joystick: The main part needed to resolve the joystick issues.
Optional Tools for Easier Handling
- Magnetic Mat or Container: Organizes screws to avoid misplacing them.
- Anti-Static Wrist Strap: Protects internal components from electrostatic discharge.
- Precision Knife: Useful for removing adhesive or stuck parts.
- Headlamp or Desk Light: Provides extra visibility while working on the console.
Ensure all tools are in good condition and appropriate for electronics. Using subpar tools can risk damage to your Switch Lite.
Identifying Problems with Switch Lite Joysticks
Before replacing your Switch Lite joystick, pinpoint the issue. Identifying the problem ensures correct repairs.
Common Symptoms of Joystick Malfunction
Understanding malfunction symptoms helps determine if replacement is necessary. Here are frequent signs of joystick issues:
- Drifting Joystick Movement: The cursor or character moves without any input.
- Unresponsive Controls: The joystick doesn’t respond when moved.
- Sticky or Stiff Joystick: The joystick feels hard to move or gets stuck.
- Erratic Behavior: Sudden, unpredictable movements in games.
- Limited Motion: The joystick won’t move in certain directions.
These symptoms can stem from wear, debris, or internal damage. Evaluate carefully to confirm replacement need.
Diagnosing Drift Issues or Physical Damage
Drift issues or physical damage require proper diagnosis. Here’s how to check the joystick thoroughly:
- Test in System Settings: Open calibration settings to test joystick movement and sensitivity.
- Inspect for Debris: Examine the joystick base for dirt or dust causing interference.
- Check for External Damage: Look out for cracks, dents, or visible wear.
- Verify Game Input Issues: Confirm problems occur consistently across multiple games.
- Compare with Other Consoles: Use another Switch Lite to compare joystick performance.
Correctly diagnosing the cause avoids unnecessary replacements. In some cases, cleaning resolves the issue. For persistent problems, replacing the joystick might be the best solution.
Preparing Your Switch Lite for Replacement
Before replacing your joystick, proper preparation ensures a smooth and safe process. Here’s how to get started.
Backing Up Your Data and Settings
- Save Your Game Progress: Open the system menu and back up your save data to the cloud or an SD card.
- Sync Your Account: Ensure your Nintendo account is synced to avoid losing purchases or user information.
- Disconnect External Devices: Remove any game cartridges, accessories, or microSD cards to prevent accidental damage.
- Document Settings: Note down preferred system configurations if manual re-entry is required later.
Backing up data protects important files and prevents frustration after the joystick replacement.
Disassembling Your Switch Lite Safely
- Power Off the Console: Turn off your Switch Lite completely to avoid electrical risks.
- Clean Your Work Area: Work on a clean surface free of clutter or debris.
- Remove the Screws: Use a small Phillips screwdriver to loosen and remove all housing screws carefully.
- Open the Shell Cautiously: Use plastic opening tools to gently separate the console casing without scratching.
- Disconnect Internal Cables: Use tweezers or a spudger tool to detach internal cables with care.
- Organize Components: Use a magnetic mat to store screws and parts for easier assembly later.
Handle your Switch Lite delicately during disassembly to avoid damaging fragile components. Proper preparation smooths the replacement process and reduces mistakes.
Step-by-Step Guide to Replace Switch Lite Joystick
Replacing your Switch Lite joystick requires careful attention to detail. Follow the steps below to ensure a smooth process.
Removing the Damaged Joystick
- Access the Console Interior: Remove screws and gently open the Switch Lite casing.
- Locate the Joystick: Identify the damaged joystick within the internal layout.
- Detach the Joystick Cable: Use a spudger tool to disconnect the ribbon cable connected to the joystick.
- Unscrew the Joystick: Remove the screws that secure the joystick to the assembly.
- Carefully Remove Joystick: Gently lift the joystick out without disturbing surrounding components.
Work slowly to avoid damaging internal parts during this step.
Installing the New Joystick Component
- Align the New Joystick: Place the replacement joystick in the correct position inside the assembly.
- Secure with Screws: Use the small Phillips screwdriver to fasten the joystick in place.
- Reconnect the Ribbon Cable: Attach the ribbon cable to connect the joystick to the console’s board.
- Test Joystick Attachment: Ensure the joystick fits snugly and moves smoothly before closing the casing.
Be gentle to avoid damaging the new joystick or other fragile parts.
Reassembling and Testing Your Console
- Close the Console Shell: Carefully snap the casing back together using plastic opening tools.
- Reinsert Screws: Secure all screws to ensure the shell is tightly closed.
- Power On the Switch Lite: Turn on the console to test the replaced joystick.
- Check Calibration: Go to system settings and calibrate the joystick for optimal performance.
- Test With a Game: Verify joystick responsiveness by trying it out with a game.
Double-check all functions to confirm a successful replacement. If issues persist, check for misalignment or loose connections.
Buying Replacement Switch Lite Joysticks
Replacing your Switch Lite joystick requires a reliable and high-quality replacement part. Buying from trusted sources ensures durability and compatibility. Below, find tips and suggestions to make the best purchase.
Recommended Vendors and Part Quality
- Official Nintendo Accessories: These guarantee compatibility and quality but might be pricier.
- Electronics Retailers: Stores like Best Buy and Walmart often stock reliable replacement joysticks.
- Online Marketplaces: Amazon and eBay have affordable options but require careful vetting of seller reviews.
- Dedicated Repair Shops: Specialized shops offer quality parts with technician-tested recommendations.
- Third-Party Brands: Brands like iFixit provide high-quality, cost-effective joystick replacements for the Switch Lite.
When evaluating vendors, prioritize customer reviews and ratings. Always check for warranty or return policies.
How to Choose the Right Model
- Verify Compatibility: Ensure the replacement joystick works specifically with the Switch Lite model.
- Check Build Quality: Select options made with durable materials for long-lasting use.
- Look for Pre-Tested Parts: Some vendors test components to guarantee performance.
- Compare Prices: Balance cost against reviews and reliability to find the best deal.
- Read Product Descriptions: Check for features like smooth movement and resistance to wear.
Choosing the right model prevents future issues and ensures optimal gaming performance. Research thoroughly before purchasing a replacement joystick.
Avoiding Future Joystick Issues
Preventing joystick problems after replacement saves time and ensures a smooth gaming experience. Follow these practices to keep your Switch Lite in optimal condition.
Tips for Proper Maintenance
Clean Regularly:
-
- Make it a habit to wipe down the joystick area using a soft, dry cloth frequently.
- This helps to remove dust, debris, and any buildup that may hinder performance.
- Regular cleaning ensures that the joystick remains responsive and functions smoothly during gameplay.
Avoid Excessive Pressure:
-
- During gameplay, be mindful of how much pressure you apply to the joystick.
- Excessive force can lead to premature wear and tear on the joystick components.
- Instead, use a gentle touch to maintain the integrity of the controls while still achieving accuracy in your movements.
Store Safely:
-
- When not in use, ensure your gaming console is stored in a pouch or protective case.
- This minimizes the risk of accidental damage from falls, impacts, or exposure to dust and grime.
- Proper storage can prolong the life of your console and its components.
Handle with Care:
-
- During intense gaming sessions, remain conscious of how you handle the joystick and other controls.
- Avoid jerking or twisting motions that could damage the internal mechanisms.
- Treat the controls with gentleness and care to ensure longevity and optimal performance.
Calibrate Periodically:
-
- Make it a point to check the joystick’s responsiveness by accessing the system settings.
- Periodic calibration can help identify and correct any drift or unresponsiveness in joystick movements.
- Regular adjustments ensure that your gameplay experience remains consistent and enjoyable.
Limit Exposure to Liquids:
-
- Be diligent about keeping your gaming console away from spills, moisture, and other liquids.
- Accidental exposure to liquids can lead to internal damage and malfunctions that are often costly to repair.
- Consider using protective covers or moisture-resistant bags when gaming in environments where spills might occur.
Proper care adds longevity to your joystick and enhances its functionality.
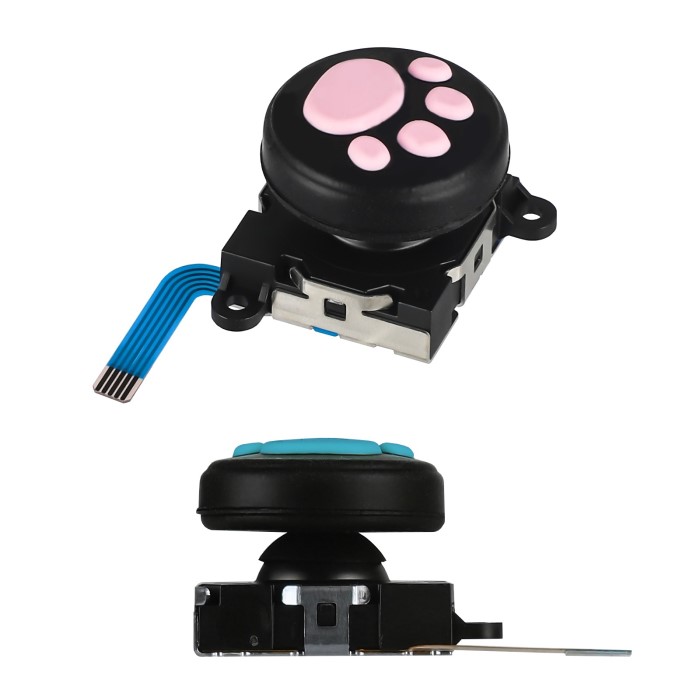
Using Protective Accessories
Joystick Caps
- Enhanced Protection: Adding caps to your joystick provides an extra layer of protection against wear and tear. These caps can help preserve the durability of the joystick, ensuring it lasts longer.
- Improved Grip: Joystick caps are designed with materials that enhance grip, making it easier to maneuver during gameplay. This can lead to improved accuracy and control, especially in fast-paced games.
- Customization Options: Many joystick caps come in various colors and designs, allowing players to personalize their gaming experience while also enhancing functionality.
Travel Case
- Sturdy Construction: Investing in a high-quality carrying case is essential for protecting your Switch Lite from potential shocks and drops. A sturdy case absorbs impact, safeguarding your device during transport.
- Organizational Features: Many travel cases come with compartments for accessories, such as game cartridges, chargers, and cables. This organization helps keep everything in one place, making it convenient for travel.
- Portability: A good travel case is lightweight and easy to carry. Look for options with comfortable handles or shoulder straps for added convenience when you’re on the go.
Screen and Console Covers
- Dust Protection: Screen and console covers act as barriers against dust and other debris, preventing them from accumulating on your device. This helps maintain the cleanliness and functionality of your Switch Lite.
- Scratch Resistance: These protective accessories can significantly reduce the risk of scratches on your screen and console. They provide a transparent shield, allowing you to see your screen clearly while protecting it from potential damage.
- Easy Installation: Most screen and console covers are designed for easy application and removal, ensuring you can switch them out as needed without leaving residue behind.
Dust Plugs
- Blocking Debris: Dust plugs are small accessories that fit into the ports of your Switch Lite. They serve to block debris from entering sensitive areas, which can cause malfunctions or damage over time.
- Maintaining Functionality: By preventing dust and dirt from accumulating in the ports, you help ensure that your device remains fully functional. This is especially important for charging ports and headphone jacks.
- Stylish Additions: Dust plugs come in a variety of designs, including fun shapes and colors, allowing you to add a personal touch to your device while serving a practical purpose.
Controller Hand Grips
- Ergonomic Design: Using ergonomic grips for your controllers can greatly improve comfort during long gaming sessions. These grips are designed to fit the natural shape of your hands, reducing fatigue and strain.
- Better Control: Hand grips provide a more secure hold, enhancing your control over the joystick. This can lead to improved precision and a better overall gaming experience, especially in competitive situations.
- Versatile Options: Many controller hand grips are customizable and can be easily attached or removed as needed. Look for options that suit your gaming style and comfort preferences for maximum enjoyment.
Investing in protective accessories ensures extended use and better performance of your console.
FAQs
How Difficult is the Replacement Process?
Replacing a joystick is moderately difficult but manageable with proper tools and instructions. Beginners may find disassembly tricky, as internal components are delicate. Following step-by-step guides ensures fewer mistakes. Using quality tools simplifies the process. Avoid rushing; take time to handle cables and screws carefully. With patience and attention to detail, even first-timers can succeed.
Can You Replace Joysticks at Home Without Professional Help?
Yes, you can replace joysticks at home. Ensure proper preparation before starting the repair. Gather all required tools and consult detailed instructions or tutorials. Most Switch Lite joystick replacement only need basic skills and common tools. Avoid professional services unless internal damage is severe. By following guidelines, you can save money and get your joystick working again.
Conclusion
In conclusion, the switch lite joystick replacement can greatly improve your gaming experience. Understanding the common joystick issues, following a step-by-step replacement guide, and committing to proper maintenance are essential for achieving ultimate comfort during gameplay. By keeping your joystick in top condition, you ensure that your Nintendo Switch Lite remains functional and enjoyable for years to come. Don’t let joystick problems affect your playtime—take action today to replace your joystick and elevate your gaming experience!