Introduction
In today’s digital world, keeping your photos organized and securely backed up is essential. Many people rely on Google Photos for storing their precious memories. However, as storage needs grow, you might wonder how to move Google Photos to external hard drive. This process is beneficial for anyone looking to free up space or create a more permanent backup solution. This article will guide you through the steps, offering detailed solutions and tips for a smooth transfer in 2026.
Why Transfer Google Photos to External Hard Drives
Benefits of Backing Up Photos to External Storage
Backing up your photos to external storage offers several key advantages. First, it provides an additional layer of security, ensuring your precious memories aren’t lost due to data breaches or account issues. Photos stored on external drives are also accessible offline, which is helpful during internet outages.
External hard drives typically provide larger storage capacities than cloud services. This allows you to store high-resolution images without concerns about running out of space. Furthermore, external drives enable faster access and sharing, reducing dependence on internet speed. Lastly, they offer flexibility, allowing you to create backups for specific projects or organize photos in ways not restricted by Google Photos’ layout.
Understanding Storage Limits and Long-Term Accessibility
Google Photos provides excellent cloud storage but has limits you should consider. Free storage is capped at 15GB, including files from Gmail and Google Drive. Paid plans can become expensive over time, especially for high-resolution photos.
External hard drives eliminate the need for renewal fees or subscriptions. Their one-time cost makes them a cost-effective solution for long-term photo storage. External drives also give you more control over your data, ensuring accessibility even if Google changes its policies or services.
Lastly, external storage protects your photos from potential account hacking or accidental deletion. By transferring your Google Photos to an external hard drive, you create a secure and permanent backup, ensuring your memories are safeguarded for years to come.
Preparing to Export Google Photos
Checking Storage Requirements on Your External Hard Drive
Before transferring photos, confirm that your external hard drive has enough storage space. Check the total size of your Google Photos collection by visiting its “Storage” section. Compare this with the capacity of your hard drive. Ensure there is extra space for future photos or additional files. If the storage is insufficient, consider upgrading to a drive with larger capacity. It’s important to verify the drive’s file system format, as some formats limit file sizes.

Organizing Photos in Google Photos for Easy Transfer
Organize photos in Google Photos before transferring them to an external hard drive. Create folders or albums to group photos by events, dates, or themes. This method simplifies the transfer process and helps maintain an organized backup. Delete unnecessary duplicates or low-quality images to save space. Proper organization also reduces the time needed to locate specific photos later on your hard drive.
Methods to Transfer Google Photos
Using Google Takeout to Export All Photos
Google Takeout is the simplest way to transfer all your photos at once. Start by visiting the Google Takeout website. Sign in with the account holding your Google Photos. From the list of services, select “Google Photos” and deselect any other services. Next, customize your export settings. You can choose the file format, frequency of export, and folder structure.
After completing these steps, click “Create Export.” Google will prepare your photos, which may take a few hours or days depending on your data size. Once the export is ready, you’ll receive an email link to download the file. Save this file to your computer, extract the contents, and transfer them to your external hard drive. Google Takeout ensures everything is exported, maintaining your photo organization.
Manually Downloading Photos from Google Photos
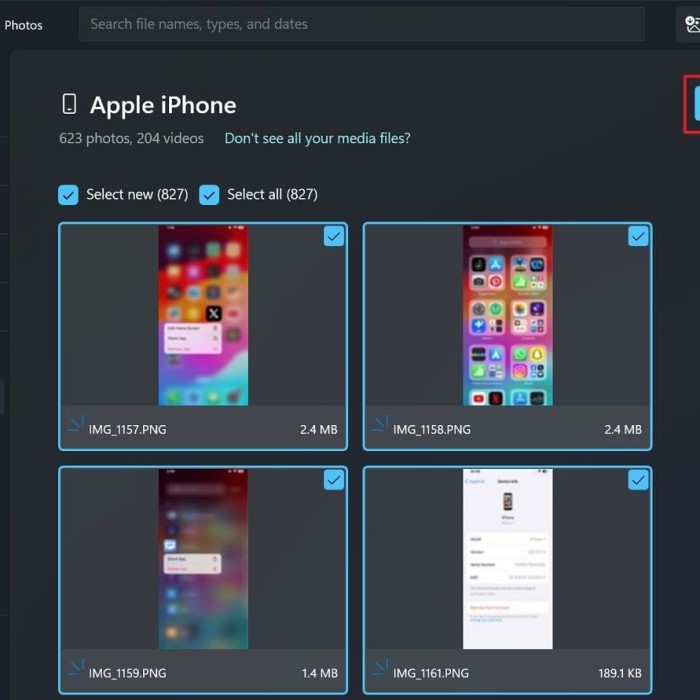
If you wish to download specific photos instead of all at once, manual downloading is a better option. Open Google Photos and sign in using your account. Navigate to the photos or albums you want. Select individual photos by clicking them, or entire albums for batch download. Once selected, click the “Download” option.
The photos will be saved to your computer in a zip file. Extract the file’s contents and review the photos to ensure nothing is missing. Then, connect your external hard drive and move the photos to the appropriate folder. Manual downloading is useful for transferring fewer photos or picking specific ones for external storage.
Connecting and Setting Up Your External Hard Drive
Setting up your external hard drive correctly is essential before transferring photos from Google Photos. Ensuring the drive is formatted and compatible with your computer can save time and prevent issues during the transfer process.
Formatting and Preparing the Hard Drive
- Check the Current Format: Verify the file system format of your external hard drive. Common formats include NTFS, FAT32, and exFAT. Some formats, like FAT32, have file size limits and may not support large photo backups.
- Reformat if Necessary: If incompatible, reformat the drive. Connect the drive to your computer and navigate to its storage settings. Choose the format best suited for your operating system. For example:
- Use NTFS for Windows systems.
- Use exFAT for compatibility between Windows and Mac systems.
- Backup Existing Data: Reformatting erases all data on the drive. Ensure you backup important files beforehand.
- Label Your Drive: Give the drive a unique name. This will make it easier to identify during transfers.
Ensuring Compatibility with Your Computer
Check Connection Type:
-
- Understanding the connection type your external hard drive uses is vital for proper functionality. External hard drives commonly utilize various connections, including USB-A, USB-C, or Thunderbolt.
- Before connecting the drive, check your computer’s ports to ensure compatibility. For instance, USB-A is a standard rectangular connector, while USB-C has a smaller, oval shape that is reversible.
- If your computer lacks the appropriate port for your external hard drive, consider purchasing an adapter. Adapters convert one connection type to another, allowing you to connect the drive without issues.
Install Necessary Drivers:
-
- Some external hard drives may require specific drivers to function correctly, especially those with advanced features or unique formatting.
- To determine whether your drive needs additional drivers, consult the user manual or the manufacturer’s website for guidance. They typically provide detailed instructions and links to necessary downloads.
- If the drive does not appear in your computer’s file explorer after connecting, it may indicate a missing driver. Follow the installation instructions on the manufacturer’s website to download and install any required drivers before attempting to connect the drive again.
Test the Drive:
-
- After connecting your external hard drive, it’s important to confirm that it is functioning properly. Start by opening the drive on your computer. You can usually find it listed under “This PC” or “My Computer,” depending on your operating system.
- To ensure that the drive can save and retrieve data effectively, create a test folder or file. For instance, you might name the folder “Test File” and add a simple text document or image within it.
- After saving the test file or folder, attempt to reopen it to verify that the data is saved correctly and can be accessed without errors. If you encounter issues during this process, consult troubleshooting resources or the manufacturer’s support for further assistance.
By formatting and ensuring compatibility, your external hard drive will be ready for safely transferring photos. These steps are simple yet crucial for seamless storage management.
Step-by-Step Guide to Transfer Photos
Using Google Takeout for Bulk Download
How to move google photos to external hard drive? Google Takeout is an efficient way to transfer all your photos at once. Follow these steps:
- Go to Google Takeout: Open the Google Takeout website and log in to your account.
- Select Google Photos: Locate “Google Photos” in the list of services and select it. Deselect other services to avoid exporting unnecessary data.
- Customize Export Settings:
- Choose your desired export format and file types.
- Select “One-time export” or set up periodic exports if needed.
- Adjust folder structure if applicable.
- Create Export: Click “Create Export.” Google will prepare your data. This process may take hours or days based on data size.
- Download Export Files: Once ready, you’ll receive an email. Download the files using the provided link.
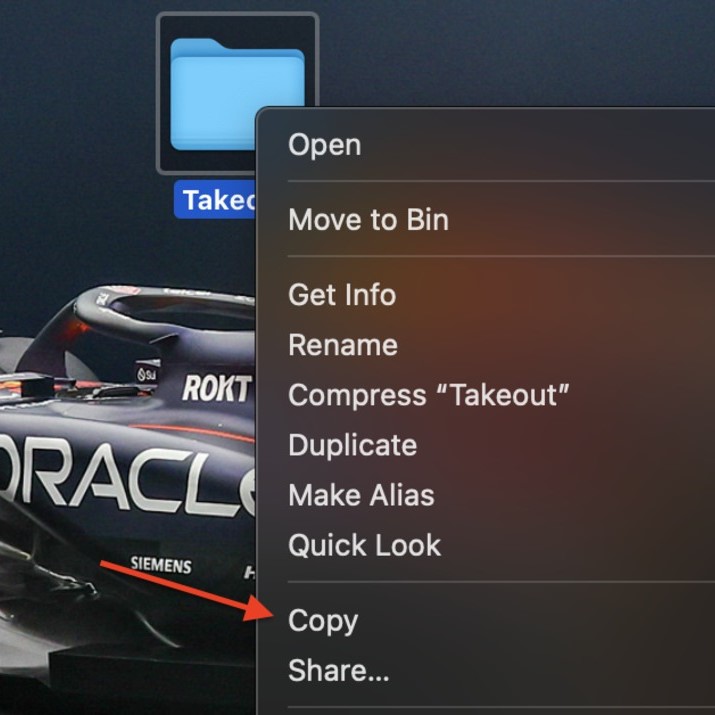
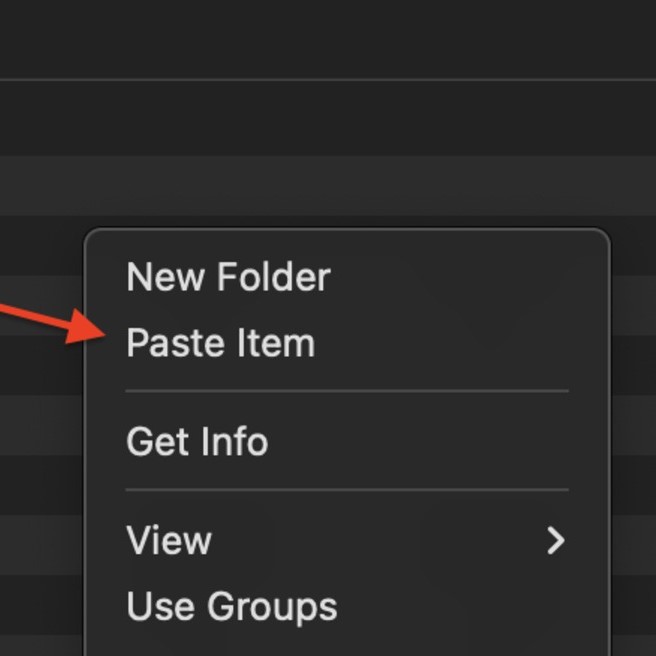
- Extract Files: Unzip the downloaded file on your computer to access the photos.
This method ensures all your photos and albums are saved in an organized setup.
Transferring Photos to External Hard Drive
How to move google photos to external hard drive? Once your photos are downloaded, follow these steps to move them to your external hard drive:
- Connect Your Hard Drive:
- Plug the hard drive into your computer using the appropriate USB or Thunderbolt cable.
- Ensure your computer recognizes the drive.
- Open the Hard Drive:
- Navigate to the drive’s folder on your computer.
- Check for enough free space to hold your photos.
- Transfer the Files:
- Locate the extracted photos on your computer.
- Drag and drop the photos or folders to the external hard drive.
- Alternatively, use “Copy” and “Paste” functions.
- Verify the Transfer:
- Open a few transferred files on your hard drive to confirm successful copying.
- Ensure the organization matches the original Google Photos layout.
- Eject Safely:
- Safely eject your drive to prevent file corruption.
- Unplug it after receiving the “Safe to Remove” notification.
Following these steps guarantees a smooth transfer of your Google Photos to an external hard drive without loss or confusion.
Common Issues and Troubleshooting
Handling File Corruption During Transfer
File corruption can occur for several reasons when transferring Google Photos to an external hard drive. Identifying and addressing these issues early ensures that your photos are intact.
- Check File Integrity: Verify photo files after transfer by opening them to ensure they function correctly.
- Use Reliable Software: Use trusted software tools to unzip files or manage transfers for better results.
- Re-transfer Corrupted Files: If files are corrupted during transfer, re-download them from Google Photos and try again.
- Avoid Sudden Interruptions: Ensure your computer and hard drive remain powered and connected throughout the process.
- Backup Originals: Always keep a copy of the original downloaded files to recover data in case of issues.
By handling file corruption promptly, you can preserve the quality of your Google Photos during storage transfer.
Resolving Connectivity Issues with Your Hard Drive
Connectivity problems can prevent efficient transfer of photos to external drives. Addressing these issues ensures seamless operation.
- Inspect Cables and Ports: Check the connection cables and USB ports for any damage or malfunction.
- Update Drivers: Ensure your hard drive drivers are updated to work with your operating system correctly.
- Test on Another Device: Plug the hard drive into another computer to confirm whether the issue is device-specific.
- Restart Devices: Restart your computer and reconnect the hard drive to resolve minor glitches.
- Contact Support: For persistent issues, consult the hard drive manufacturer or seek professional assistance.
By resolving connectivity problems promptly, you can safely transfer your Google Photos without disruptions.
Tips for Organizing Photos on External Storage
Organizing photos on your external storage helps you locate and manage files quickly. Proper organization prevents clutter and saves time.
Creating Folders and Naming Conventions
- Use Folders for Categories: Group photos by events, dates, or themes for easy navigation.
- Create Subfolders: Inside main folders, organize subfolders for specific occasions or places.
- Follow Naming Standards: Name folders clearly. For example, “Vacation_2023” or “Birthday_Party_March.”
- Include Dates: Adding the date in folder names keeps your backups orderly and chronological.
- Avoid Generic Names: Generic names like “Untitled” or “Folder1” can cause confusion later.
- Use Consistent Style: Pick a format for folder names and stick to it.
Regularly Updating Your External Photo Backup
- Schedule Regular Backups: Set reminders to add new photos every month or after major events.
- Replace Old Photos: Update older low-quality photos with better versions when necessary.
- Remove Duplicates: Periodically check for and delete duplicate files.
- Test File Accessibility: Open files occasionally to ensure they work and aren’t corrupted.
- Add Recent Files: Don’t forget to back up recently transferred photos from Google Photos.
- Keep Storage Space Free: Ensure your external drive has room for future photos or projects.
By following these tips, you’ll create a well-organized, reliable photo storage system on your external hard drive.
Conclusion: Safeguarding Your Photos
In conclusion, understanding how to move Google Photos to external hard drive is essential in today’s digital landscape. By following the steps outlined in this article, you can effectively backup and organize your photos. This process will not only free up space in your Google account but also provide you with peace of mind knowing that your memories are securely stored. Embrace the convenience of using an external hard drive as a robust backup solution in 2026 and beyond. Start the process today to ensure your precious memories remain safe for years to come.