Introduction to the World of Analog Imaging
Photography is a beloved hobby for many people today. Most of us use smartphones or digital cameras for snapshots. However, there is a growing interest in the roots of photography. Specifically, enthusiasts are returning to basic, mechanical methods. A pinhole camera represents the most fundamental form of photography. It captures images without any complex lenses or electronics. Consequently, building one offers a unique satisfaction. You create art through pure physics and simple materials. Furthermore, this process teaches you about light and exposure. You learn how images form in a dark space.
Many photographers find this knowledge invaluable for their modern work. Additionally, making a camera by hand is a rewarding craft project. It connects you to the history of science and art. The concept is surprisingly simple to understand. Yet, the results can be mysteriously beautiful. Therefore, this guide will explore every aspect of this topic. We will discuss the science, the build process, and the artistic potential. Whether you are a student or a seasoned artist, this project appeals to all ages. It requires patience and creativity rather than expensive equipment. Thus, you can start this journey with confidence. The following sections provide a detailed roadmap. You will soon create stunning images with your own homemade device.
Understanding the Science Behind the Pinhole Camera
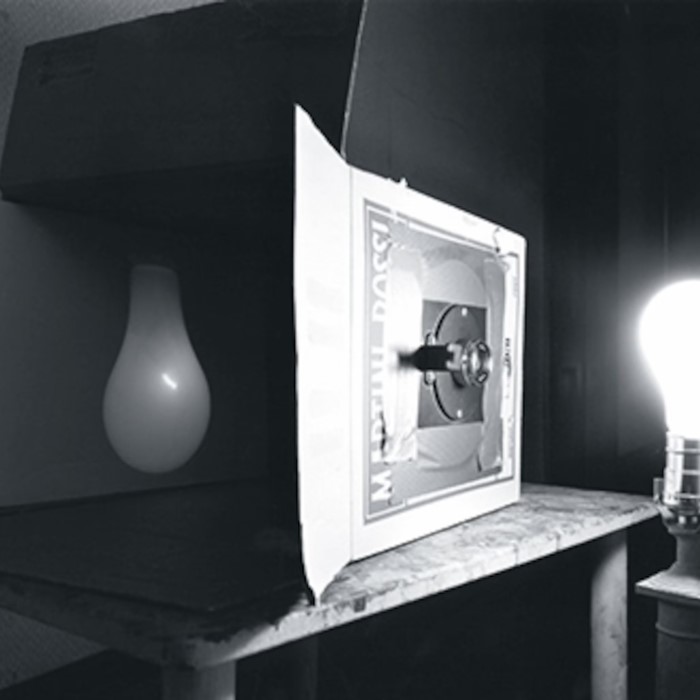
To build a good camera, you must understand the physics. The operating principle is known as the “camera obscura” effect. This phenomenon has been observed for centuries. Basically, light travels in straight lines. When light passes through a tiny hole, it creates an image. This image appears on the opposite wall of a dark chamber. Consequently, the scene outside is projected upside down. A pinhole camera works exactly like this. The small aperture acts as a lens. It restricts the light beams to a single path. Therefore, the image becomes sharper. If the hole is too big, the image gets blurry. This happens because too many light rays overlap.
Conversely, if the hole is too small, diffraction occurs. Diffraction bends the light waves and softens the image. Thus, finding the perfect hole size is critical. You must calculate the optimal diameter based on focal length. Focal length is the distance from the hole to the film. Moreover, this science explains why we need long exposure times. The tiny hole lets in very little light. Consequently, the film needs more time to record the image. Understanding these variables helps you control the outcome. You manipulate the light through geometry. It is a beautiful blend of math and art. Therefore, before cutting any cardboard, study these concepts. They ensure your final product functions correctly.
Gathering Essential Materials for Your Project
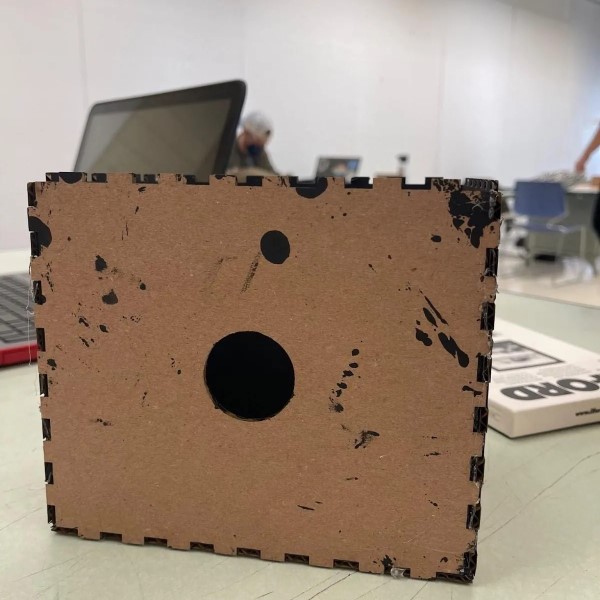
You do not need expensive supplies to start. In fact, most materials are likely in your home already. First, you need a light-tight container. This body must not let any light leaks occur. Consequently, thick cardboard boxes are popular choices. Oatmeal canisters or shoeboxes work very well. Alternatively, you can build a box from scratch using foam core. This method allows for custom dimensions. Next, you need material for the aperture. Aluminum cans are perfect for this. The metal is thin and easy to puncture. Additionally, you need a needle or pin to make the hole. Sandpaper is also necessary to smooth the edges.
Furthermore, you need a way to hold your light-sensitive material. You can use photographic paper or sheet film. Photographic paper is easier for beginners to handle. It is less sensitive and cheaper to buy. You will also need tape. Black electrical tape or gaffer tape works best. It seals gaps and holds parts together. Moreover, you must paint the interior black. Matte black paint absorbs stray light. This prevents internal reflections that fog the image. Finally, you need a “shutter.” This is simply a piece of tape or cardboard. It covers the hole until you are ready to shoot. Gathering these items takes little time. However, choosing quality materials ensures a durable camera. Therefore, select your supplies with care.
Step-by-Step Construction Guide for Beginners
The construction process requires precision and patience. First, you should prepare your container. If you use a box, paint the inside completely black. This step is crucial for image quality. Therefore, apply two coats to ensure no light reflects. Next, you construct the aperture. Cut a small square of aluminum from a can. Then, use a needle to gently poke a hole. You should rotate the needle to make a clean circle. Ideally, the hole should be as circular as possible. Afterward, use fine sandpaper to sand the back of the hole. This removes the burr created by the needle. Consequently, the aperture becomes smoother and cleaner.
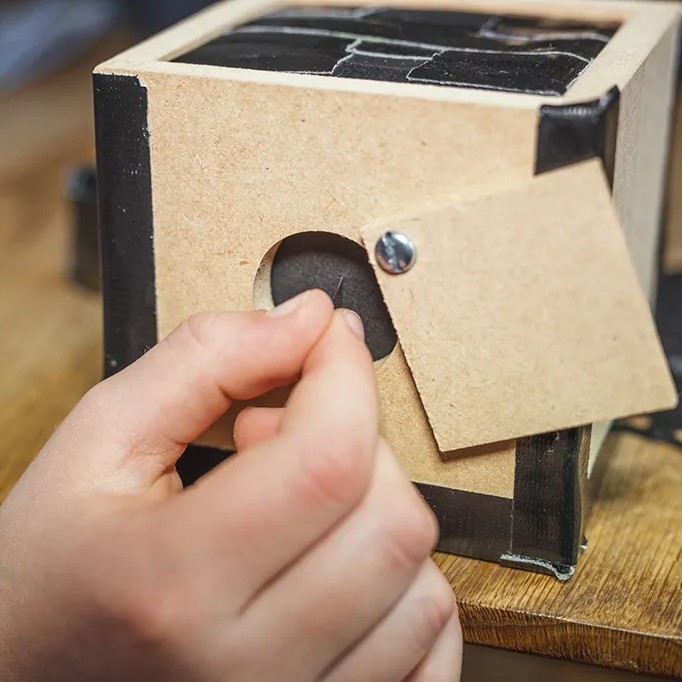
You then tape this metal square over a larger hole cut in your camera body. Ensure no light enters around the edges. Now, you must make the shutter. A simple flap of black tape works well. Place it over the pinhole securely. Furthermore, you need a film holder. If using a canister, the lid holds the paper opposite the hole. For a box, you need a holder at the back. You must secure the paper with tape. However, do this in a completely dark room. Any light will ruin the paper. Finally, seal the camera body with tape. Check every seam and corner for potential leaks. Thus, your device is ready for action.
Calculating Exposure Times and f-stops
Operating a homemade device differs from using a digital camera. You cannot rely on automatic light meters. Therefore, you must perform some calculations. First, you need to determine your f-stop. The f-stop is the ratio of focal length to the pinhole diameter. You measure the distance from the hole to the film. Then, you measure the diameter of the hole precisely. Dividing the distance by the diameter gives the f-number. A typical homemade pinhole camera might have an f-stop of f/150 or higher. This number is much larger than standard lenses. Consequently, the exposure time increases significantly. You will need a calculator or a smartphone app for reciprocity failure. Reciprocity failure occurs during long exposures. The film becomes less sensitive over time. Therefore, you must extend the exposure further than the meter suggests.
For example, a meter might suggest 1 second. But for pinhole, it could be 2 minutes. Furthermore, lighting conditions play a huge role. Sunny days require less time than cloudy days. You should keep a notebook to record your settings. Write down the time of day and weather. Also, record the exposure duration. This log helps you improve with every shot. Trial and error are part of the learning curve. Eventually, you will develop an intuition for the light. Thus, do not get discouraged by initial failures.
Loading and Shooting with Your Homemade Device
Loading the camera requires total darkness. You can use a closet at night or a darkroom. First, ensure all lights are off. Wait a few minutes for your eyes to adjust. You should not see your hand in front of your face. Then, take a sheet of photographic paper. Place it emulsion-side out on the back of the camera. The emulsion side is usually the shiny side. Secure it with a small piece of tape. Afterward, seal the camera body shut. You can test for light leaks by carrying the camera outside briefly. If the paper shows gray spots, you have a leak. Therefore, return to the dark and re-seal the seams. Once loaded, you are ready to shoot. Place the camera on a stable surface.
A tripod is best, but a table or wall works. The camera must remain perfectly still. Even a slight shake blurs the image. Consequently, hold your breath during the exposure. Open the shutter gently. You can count the seconds or use a stopwatch. When the time is up, close the shutter. Now, you have a latent image on the paper. You must return to the darkroom to develop it. This process creates a negative image. You can then scan or print it. Thus, the cycle of analog photography is complete.
Developing the Image and Post-Processing
Developing your image is a magical moment. You see the results of your hard work. You need a darkroom with a safe light. Red light is safe for black and white paper. You also need trays of chemicals. Specifically, you need developer, stop bath, and fixer. First, you place the exposed paper into the developer. You should gently agitate the tray. Consequently, the image will slowly appear on the paper. This usually takes one to two minutes. If the image is too dark, you overexposed. If it is faint, you underexposed. Next, move the paper to the stop bath. This halts the development process. After thirty seconds, move it to the fixer. The fixer makes the image permanent.
It removes the unexposed silver crystals. Therefore, you can turn on the lights after fixing. You must then wash the print in water. This removes the chemicals. Finally, you have a paper negative. You can scan this negative into a computer. Then, you can invert the colors digitally. This turns the negative into a positive image. You can also adjust contrast and brightness. Thus, you blend analog and digital workflows. This hybrid approach yields the best quality. It allows for the unique look of a pinhole with modern convenience.
The Artistic Appeal of Pinhole Photography
Many people ask why they should build a camera. Digital photography is faster and sharper. However, a pinhole camera offers a distinct aesthetic. The images have an infinite depth of field. Everything from the foreground to the background is relatively sharp. Yet, the overall image has a soft, dreamy quality. Furthermore, the wide angle of view is often unique. It distorts perspective in interesting ways. Consequently, the photos look surreal and vintage. Additionally, the long exposure times capture time itself. Moving objects like cars or people disappear. They become ghosts or blurs. Only stationary objects remain solid. This effect allows for creative expression.
You can capture the flow of a waterfall over minutes. Or you can trace the path of the sun across the sky. This technique is called solargraphy. Moreover, the square or rectangular format fits well in galleries. The vignetting around the edges adds a natural frame. Photographers appreciate the unpredictability. You never know exactly what you will get. Therefore, it forces you to embrace chance. This freedom is refreshing in a digital world. It reconnects the artist with the medium of light. Thus, pinhole photography remains a vital art form.
FAQ
How does a pinhole camera work?
A pinhole camera works by allowing light to pass through a tiny aperture. This light travels in straight lines from the subject. Consequently, the light projects an inverted image onto the internal surface. This phenomenon is known as the camera obscura effect.
How to make a homemade pinhole camera?
You can make a homemade pinhole camera using a shoebox or a can. First, paint the interior black to prevent reflections. Then, create a small pinhole in a piece of aluminum foil. Place this foil over a hole in the box. Finally, load photographic paper inside in a dark room. Use a tape flap as a shutter.
Do pinhole cameras really work?
Yes, pinhole cameras really work effectively. They capture real images without any lenses. However, they require long exposure times due to the small aperture. Therefore, you must keep the camera very still during the exposure. The results are often artistic and unique.
Conclusion: Embracing the Basics of Imaging
Building a camera is a journey of discovery. It combines science, craft, and art into one project. We have covered the essential steps. You learned about the history and physics. Furthermore, you know how to build and operate the device. The process requires patience and attention to detail. However, the reward is worth the effort. You create unique images that stand out. A pinhole camera strips photography down to its core elements. It removes the technology and focuses on light. Consequently, you gain a deeper understanding of the medium. This knowledge improves all your photographic work.
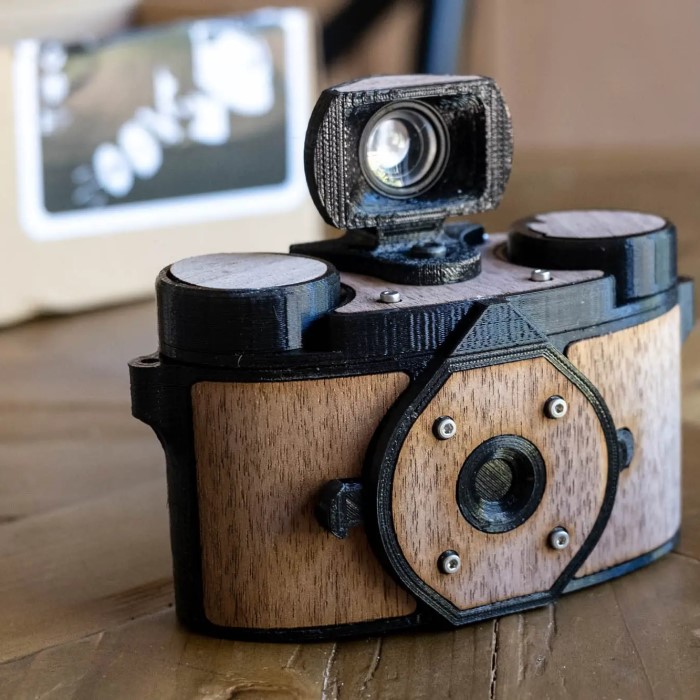
You appreciate the simplicity of the camera obscura. Moreover, you join a community of creators who value analog methods. Whether you use a shoebox or a 3D printed model, the principle remains the same. Therefore, gather your materials and start building. Experiment with different designs and exposures. The possibilities are endless. You will find that making the camera is just as fun as taking the picture. Ultimately, this project proves that you do not need expensive gear to be creative. You only need a box, a hole, and some light.