Introduction to Finding Your Motherboard Model
When delving into computer upgrades or repairs, knowing your motherboard model is crucial. Understanding how to find motherboard model can help you procure the correct components, troubleshoot issues more effectively, and maintain compatibility. This guide aims to provide an in-depth look at the various methods for identifying your motherboard model, offering DIY enthusiasts the necessary tools and knowledge to succeed. Let’s explore this important process, addressing everything from manual identification to software solutions.
Why Is Knowing Your Motherboard Model Important?
Before we dive into the specifics of how to find motherboard model, it’s essential to understand why this knowledge matters. Your motherboard is the backbone of your PC, connecting all components such as the CPU, RAM, and storage devices. If you’re planning a hardware upgrade, knowing the model helps determine which parts are compatible. Trying to install a new CPU or RAM can lead to performance issues or even damage if incompatible components are selected. Furthermore, knowing your motherboard model allows you to access the latest firmware updates and drivers ensuring optimal performance of your system.
Common Methods for Identifying Your Motherboard Model
Finding your motherboard model might seem daunting, but several straightforward methods can assist you. Generally, users can choose from a physical inspection, Windows utilities, or specialized software. Each method varies in difficulty and accessibility. Below are some common methods you can use to uncover this essential information.
Physical Inspection of the Motherboard
The most straightforward way to identify your motherboard model is through physical inspection. Follow these steps:
- Power Down Your PC: Always ensure your computer is completely turned off before opening the case. Unplug it from the power source.
- Open the Case: Carefully remove the side panel of your computer case. You might need a screwdriver, depending on your case design.
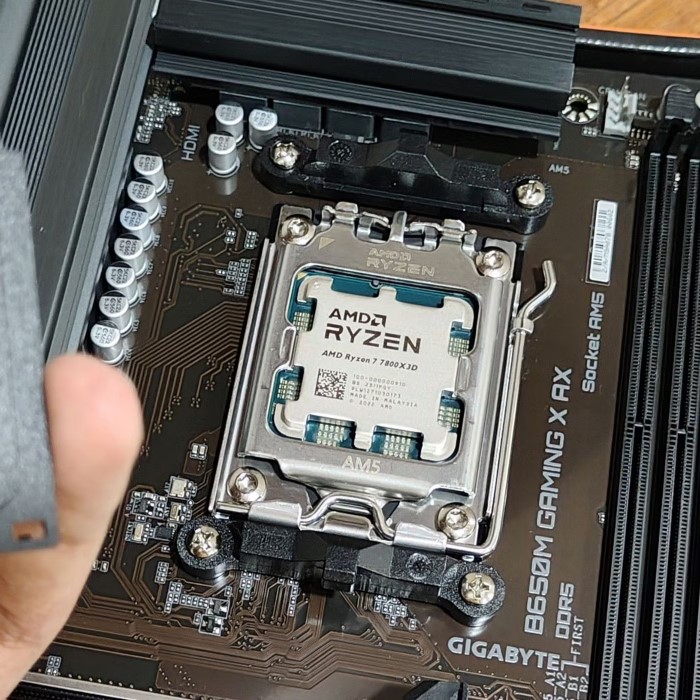
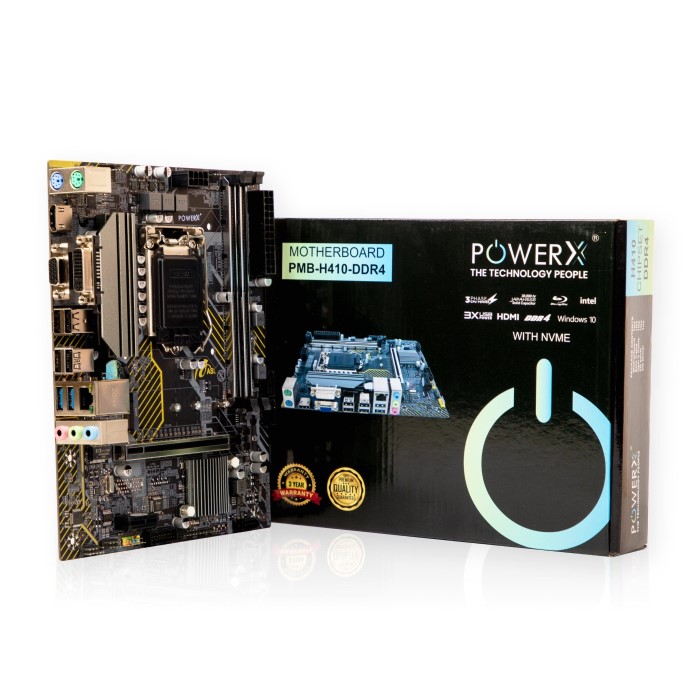
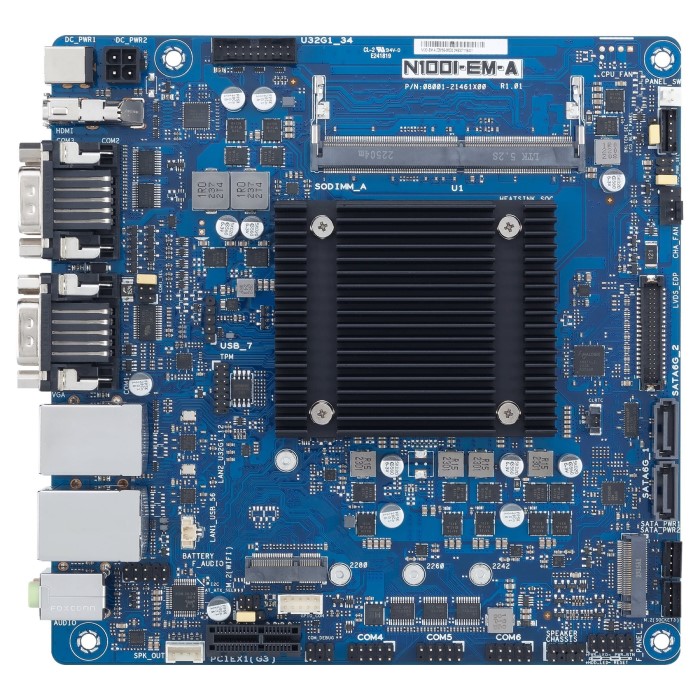
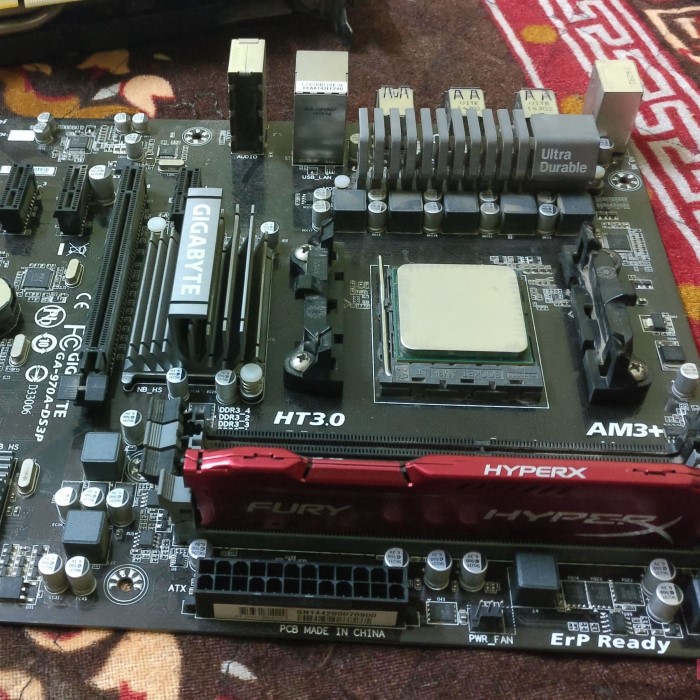
- Locate the Motherboard: Once the case is open, look for the largest circuit board – this is your motherboard.
- Examine the Label: Most motherboards have their model number printed directly on the board itself. Look for a large text that includes words like “Model,” “Type,” or “Serial Number.”
While this method offers a clear and definitive identification, it requires disassembling your computer, which may not be suitable for everyone.
Using Windows Command Prompt
If you prefer not to open your computer, you can find your motherboard model using the Command Prompt. This method is especially useful for users who are less tech-savvy. Here’s how:
- Open Command Prompt: Press
Windows Key + Rto open the Run dialog, then type “cmd” and press Enter. - Enter the Command: In the Command Prompt window, type the following command:
wmic baseboard get product,Manufacturer,version,serialnumberThis command fetches and displays your motherboard details.
- Review the results: You should see the product name of your motherboard along with other information like the manufacturer and version.
This method is quick and requires no physical disassembly of your PC.
Utilizing System Information Tool
Windows provides a built-in System Information tool that can also help you find the motherboard model. To access this tool:
- Open Run Dialog: Press
Windows Key + R. - Type ‘msinfo32’: Input “msinfo32” and hit Enter to launch the System Information utility.
- Navigate to System Summary: In System Summary, you will find details about your hardware.
- Locate Baseboard Manufacturer and Product: Look for entries labeled “Baseboard Manufacturer” and “Baseboard Product.” The product name is your motherboard model.
This alternative method is straightforward and effective, perfect for users who want a hassle-free solution.
Software Solutions for Motherboard Identification
While manual methods are effective, several software applications can simplify the process even further by providing detailed information about your system hardware.
Using CPU-Z
CPU-Z is a widely-used utility that displays the specifications and details of your computer’s hardware, including the motherboard model. Here’s how to use it:
- Download and Install CPU-Z: Head over to the official CPU-Z website, download the installation file, and follow the instructions to install it.
- Launch CPU-Z: Open the program once installation is complete.
- Navigate to the Mainboard Tab: Click on the “Mainboard” tab. Here, you will see detailed information regarding your motherboard, including its model, manufacturer, and chipset.
CPU-Z offers a user-friendly interface and can provide a wealth of information beyond just the motherboard, making it a handy utility for any DIY enthusiast.
Using Speccy
Speccy is another tool similar to CPU-Z, which provides detailed insights into your computer’s hardware. To use Speccy, follow these simple steps:
- Download Speccy: Visit the official website, download the application, and install it.
- Run Speccy: Open the program post-installation.
- Check Summary: The main summary will display overall system statistics including your motherboard model, manufacturer, and more.
This software tool is particularly helpful for users looking for comprehensive data on their PC’s components.
How to Find Asus Motherboard Model
For those specifically looking to find Asus motherboard models, the general methods remain applicable. However, Asus motherboards often come with branded utilities that may provide additional features.
Using MyASUS
- Introduction to MyASUS
- MyASUS is an application provided by Asus, designed to help users manage and optimize their Asus devices.
- It includes features for system diagnostics, updates, and technical support.
- Automatic Detection of Your Motherboard
- One of the key functionalities of MyASUS is its ability to automatically detect your motherboard.
- This feature simplifies the process of identifying essential system information without requiring manual intervention.
- Accessing System Information
- After installing and launching MyASUS, users can navigate through the application to find relevant system details.
- The app provides a user-friendly interface, making it easy for both novice and experienced users to access information about their motherboard.
- Additional Features of MyASUS
- In addition to detecting the motherboard, MyASUS offers various tools for updating drivers and improving system performance.
- The app can help users troubleshoot issues and access customer support for any inquiries related to their Asus devices.
- How to Download MyASUS
- MyASUS can usually be found pre-installed on most Asus laptops. However, users can also download it from the official Asus website or the Microsoft Store.
- Simply follow the installation prompts to set it up on your device.

Checking the BIOS
- Understanding BIOS
- BIOS (Basic Input/Output System) is a firmware interface that acts as a bridge between your computer’s hardware and operating system.
- It is essential for booting up the computer and hardware configuration.
- Restart Your Computer
- To access the BIOS setup, you need to restart your computer.
- Ensure that you save any open files and close all applications before proceeding.
- Entering BIOS Setup
- As your computer begins to restart, look for a prompt indicating which key to press to enter BIOS. Common keys include
F2,DEL, orESC. - Press the appropriate key repeatedly during startup to enter the BIOS menu.
- As your computer begins to restart, look for a prompt indicating which key to press to enter BIOS. Common keys include
- Locating Motherboard Information
- Once in the BIOS setup, navigate through the available menus using your keyboard.
- The motherboard information is often displayed on the main screen or in the “System Information” section, detailing the model, manufacturer, and bios version.
- Using BIOS Information
- Accessing the motherboard details through BIOS is particularly useful for users who need to change settings, update firmware, or troubleshoot hardware issues.
- It’s a direct way to gather accurate information in case other methods are unavailable.
- Exiting BIOS
- After retrieving the necessary information, you can exit the BIOS by selecting the option to “Save and Exit” or simply “Exit,” ensuring any changes made are saved if necessary.
- The system will then continue to boot into the operating system as normal.
Both methods work seamlessly for Asus motherboards, ensuring users can easily access the information they need.
Troubleshooting Common Issues
If you encounter difficulties in finding your motherboard model, consider the following troubleshooting tips:
Ensure Proper Connections:
-
- Before proceeding with any troubleshooting, check that all cables and connections are securely attached. Loose or improperly connected components can lead to malfunction.
- If you are utilizing software methods to diagnose issues, confirm that all related hardware components—such as the CPU, RAM, and storage devices—are functioning properly.
- Additionally, verify that the correct drivers are installed for all connected devices. Outdated or missing drivers can hinder performance and prevent proper communication between the operating system and hardware.
Verify BIOS Settings:
-
- If you find that you cannot view the motherboard information upon entering the BIOS, it’s important to investigate the BIOS settings.
- Check if the motherboard is powered correctly and that all relevant components are detected by the BIOS. If not, you may need to reset the BIOS to its default settings.
- Make sure that the configuration settings are tailored to your system’s hardware setup, including any necessary adjustments for boot order and component recognition.
Update Your Operating System:
-
- Keeping your operating system updated is crucial for optimal performance and system stability. Regular updates often include important patches and improvements.
- Check for any pending updates in your system settings, as many drivers and system utilities rely on having the latest operating system updates to function correctly.
- Ensure that critical updates are not only installed but also that your system is set to automatically receive updates in the future, minimizing the risk of running outdated software.
By following these tips, you’ll be better equipped to troubleshoot issues related to your motherboard identification.
Frequently Asked Questions
How do I find my motherboard model using CMD?
You can find your motherboard model by opening the Command Prompt and typing:
wmic baseboard get product,Manufacturer,version,serialnumber
This command will display the necessary information directly in the command window.
Does CPU-Z show my motherboard model?
Yes, CPU-Z directly shows your motherboard model along with additional specifications when you click on the “Mainboard” tab after opening the application.
How to find Asus motherboard model?
You can find your Asus motherboard model using the MyASUS app or by checking boot up in BIOS settings. Both methods provide accurate results quickly.
Conclusion
Understanding how to find motherboard model is an invaluable skill for any DIY computer user. Whether you are looking to upgrade hardware or troubleshoot an existing system, knowing your motherboard model facilitates the entire process. From methods involving physical inspection to utilizing software tools like CPU-Z or Speccy, there are plenty of options available to suit your preference. If you follow the guidance provided in this article, identifying your motherboard will become a straightforward task. Remember, having the right information allows you to make informed decisions about upgrades and repairs, ultimately leading to a smoother, more efficient computing experience. Keep these methods in mind, and you will confidently navigate your way through computer hardware management.