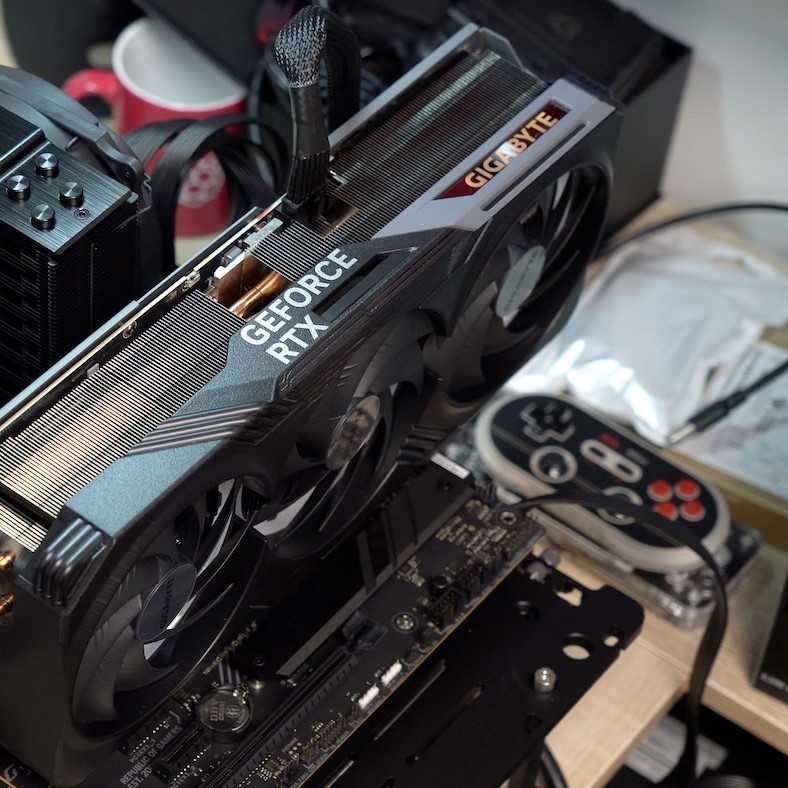
Introduction: Understanding BIOS Updates
Updating the BIOS on your ASUS motherboard is not just a technical necessity; it’s a fundamental step for optimizing your computer’s performance and ensuring compatibility with the latest hardware technologies. The BIOS, or Basic Input/Output System, serves as the interface between your computer’s operating system and its hardware components during the boot-up process. Newer versions of BIOS can provide enhanced features, bug fixes, and improved hardware compatibility. In this extensive guide, we will walk you through how to update bios on asus motherboard effectively. Whether you are a novice or an experienced user, understanding the steps involved will empower you to enhance your system’s capabilities confidently.
What is BIOS and Why Update It?
To understand the importance of updating your BIOS, let’s begin with a brief overview of what BIOS is and its role within your system.
The Function of BIOS
BIOS is the first piece of code that runs when you power on your computer. It performs several critical functions, including:
- Power-On Self Test (POST): This routine checks your hardware components to ensure they are functioning correctly. If any issues are detected, you may hear beeps or see error messages.
- Boot Device Selection: After completing POST, BIOS determines the boot device, such as a hard drive, SSD, or USB drive, and loads the operating system from that device.
- Hardware Initialization: BIOS initializes the system hardware, including CPU, RAM, and peripherals, allowing them to communicate with the operating system.
- Configuration Settings: Users can configure various hardware settings, including boot order, clock speeds, and system voltages, through the BIOS interface.
Why is Updating BIOS Important?
Now that we understand what BIOS does, let’s explore why updating it is crucial:
- Enhanced Compatibility: New hardware components, such as processors and memory, often require updated BIOS versions for optimal compatibility. If you plan to upgrade your CPU or RAM, updating the BIOS may be necessary.
- Improved Performance: Manufacturers frequently release updates that can optimize system performance, increase stability, and reduce energy consumption. These enhancements can help you get the most out of your hardware.
- Bug Fixes: Just like software, BIOS can have bugs. An update may resolve issues related to system stability or performance, reducing crashes and unexpected behaviors.
- Security Improvements: Firmware vulnerabilities can expose your system to security risks. Updating the BIOS can patch these vulnerabilities, enhancing your system’s security.
- New Features: Updates can introduce new features and functionalities that were not available in the previous versions. This might include support for new boot modes or improved system management tools.
Preparing for the Update
Before you dive into how to update BIOS on an ASUS motherboard, it’s essential to prepare adequately. A little preparation can go a long way in ensuring a smooth updating process.
Backup Your Data
The first step in preparation is backing up your important data. While updating the BIOS is generally safe, there is always a small risk of something going wrong. Use an external hard drive or cloud storage to secure your files. This precaution will ensure that you don’t lose anything important in case of an unexpected failure during the update process.
Gather Necessary Tools
For a successful BIOS update, you’ll need some specific tools:
- USB Flash Drive: A USB drive is essential for transferring the BIOS file from your computer to the BIOS update utility.
- Latest BIOS Update: Download the latest BIOS version from the official ASUS support website for your specific motherboard model.
- Stable Power Source: Connecting your computer to a reliable power source is crucial. A power interruption during the update can render your motherboard unusable, so it’s best to use a UPS (Uninterruptible Power Supply) if available.
Step-by-Step Guide on How to Update BIOS on ASUS Motherboard
Now that you’re prepared, let’s go through the step-by-step process of updating your BIOS.
Step 1: Identify Your Motherboard Model
The first step in the BIOS update process is identifying your ASUS motherboard model. You can do this in several ways:
- Check Your Packaging/Documentation: If you have the original packaging or manuals, the model number will be listed there.
- Use a System Information Tool: Third-party software tools like CPU-Z can provide detailed information about your motherboard, including the model number.
- Boot Up Your Computer: During the initial boot sequence, your motherboard model may be displayed briefly on the screen.
Step 2: Download the Latest BIOS
Once you know your motherboard model, head over to the official ASUS support website:
- Enter your motherboard model into the search bar.
- Navigate to the “Drivers & Tools” section.
- Locate the “BIOS” category and select the latest version compatible with your motherboard.
- Download the BIOS file and save it to your computer.
Step 3: Create a Bootable USB Drive
Before proceeding, you’ll need to create a bootable USB drive:
- Insert Your USB Drive: Plug the USB flash drive into your computer. Make sure it has enough free space, as you will need it for the BIOS file.
- Format the USB Drive:
- Right-click on the drive in Windows Explorer and select “Format.”
- Choose the FAT32 file system, which is the most compatible with BIOS utilities.
- Click “Start” to format the drive. Note that this action will erase all data on the drive.
- Copy the BIOS File: Drag and drop the downloaded BIOS file into the root directory of the USB drive. Ensure that it is the only file on the drive for a clean update process.
Step 4: Enter BIOS Setup
Now that your USB drive is prepared, you’ll need to access the BIOS setup:
- Reboot Your Computer: Restart your computer.
- Enter BIOS: During the boot process, repeatedly press the BIOS access key (usually DEL or F2) to enter the BIOS setup utility.
- Navigate to EZ Flash Utility: Once in the BIOS, locate the “Tool” tab. Here, you’ll find an option labeled “ASUS EZ Flash Utility.”
Step 5: Update the BIOS
With the ASUS EZ Flash Utility open, follow these steps:
- Select EZ Flash Utility: Choose the utility to launch the BIOS update feature.
- Select Flash Drive: The utility will ask you to select a USB drive. Choose the drive that contains your downloaded BIOS file.
- Choose the BIOS File: Navigate to the BIOS file on your USB drive and select it.
- Start the Update: Confirm that you want to proceed with the BIOS update. The utility will begin flashing the new BIOS. This process may take several minutes. Do not turn off your computer during this time.
- Complete the Update: Once the update is complete, the system will usually reboot automatically. Allow your computer to reboot.
Troubleshooting Common Issues
While updating the BIOS is a straightforward process, issues can sometimes arise. Here are some common problems and solutions:
- Black Screen After Update: If your system fails to boot after the update, do the following:
- Reset the BIOS to default settings by removing the CMOS battery for about 5-10 minutes. This action will clear old settings and may allow the system to boot.
- Stuck on Updating Screen: If you find the update process is freezing:
- Wait at least a few minutes; in rare cases, BIOS updates can take longer to process.
- If freezing persists, restart your system. This is risky, but if all else fails, it may be necessary.
- Invalid BIOS File Error: If you receive an invalid file error:
- Ensure the BIOS file is correctly named and downloaded from the ASUS support website. Double-check that it matches your motherboard model.
- Power Failure During Update: This scenario is the worst-case scenario. If the BIOS becomes corrupted:
- You may need to perform a recovery using a backup BIOS if your motherboard supports it. Refer to your motherboard manual for specific recovery instructions.
FAQs About ASUS BIOS Updates
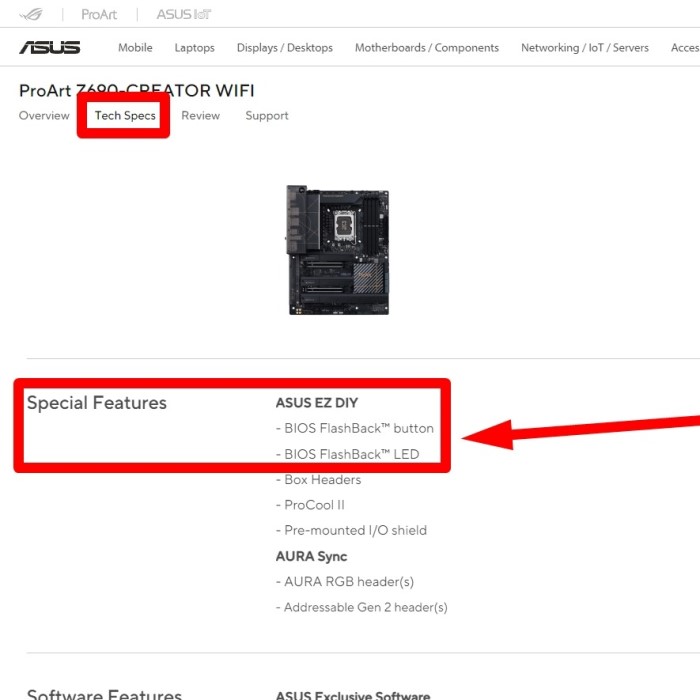
Does ASUS have a BIOS update tool?
Yes, ASUS provides the “ASUS EZ Flash Utility,” which is integrated into the BIOS. This user-friendly tool allows for efficient BIOS updates directly from the BIOS interface, enabling you to select BIOS files directly from a USB flash drive.
How do I update my BIOS on my motherboard?
To update your BIOS, download the specific BIOS version for your motherboard from the ASUS website. Create a bootable USB drive, enter the BIOS setup during boot, and use the EZ Flash Utility to load the new BIOS file and complete the update process.
Do I need to install every BIOS update on ASUS?
No, it is essential to assess each update based on your system’s needs. If an update addresses a specific issue you are facing or adds support for new hardware, then it is worth installing. Otherwise, you can skip updates without concerns unless your system experiences instability.

Best Practices for BIOS Management
Updating the BIOS can be beneficial, but it is also crucial to manage this process wisely. Here are some best practices:
- Stay Informed: Keep an eye on announcements from ASUS regarding updates. Follow their official news channels for information on updates relevant to your motherboard.
- Wait for Reports: If an update is newly released, consider waiting for user feedback. Early adopters may face issues that are documented, allowing you to dodge potential pitfalls.
- Avoid Unnecessary Updates: Do not rush to update the BIOS unless you have a specific reason. If your system is stable and functioning well, it may not require an update.
- Always Use Official Sources: Never download BIOS files from unofficial or dubious sites. Always use the official ASUS support page to ensure you’re getting safe and verified files.
- Document Settings: Before updating the BIOS, document your current settings. Should you need to revert any changes, having this information will make that process significantly easier.
Conclusion: Maintaining Your ASUS Motherboard
In closing, mastering how to update BIOS on ASUS motherboard is an essential skill that can profoundly impact system performance and reliability. Regular updates ensure your hardware remains compatible with new technologies and stays secure against emerging threats. The process may appear daunting, but with careful preparation, clear steps, and knowledge, you can confidently manage BIOS updates.
By following this comprehensive guide, you are empowered to keep your ASUS motherboard updated and optimized for peak performance. The knowledge gained here will not only help in addressing immediate needs but also serves as a foundation for future maintenance efforts. Don’t hesitate to revisit this guide whenever you need assistance, and always prioritize security and stability for an uninterrupted computing experience.